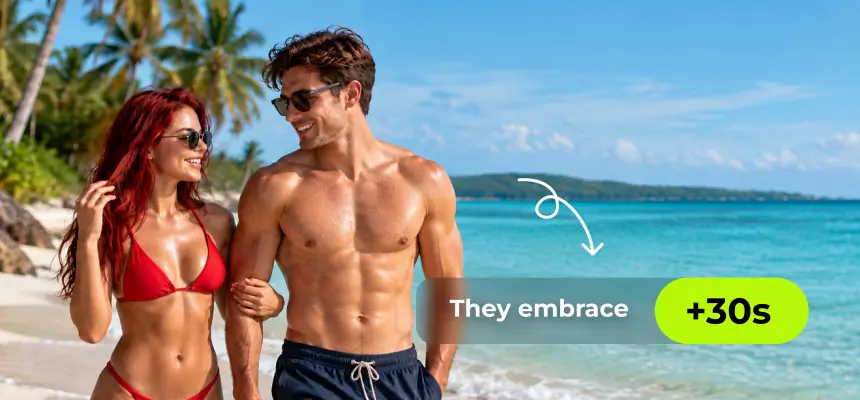
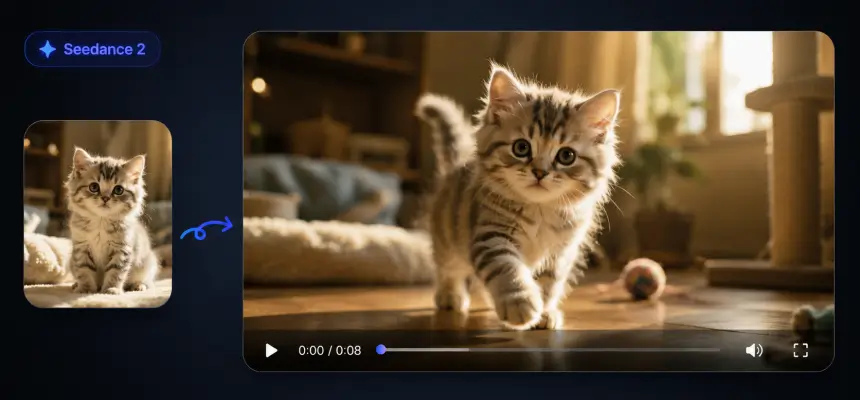
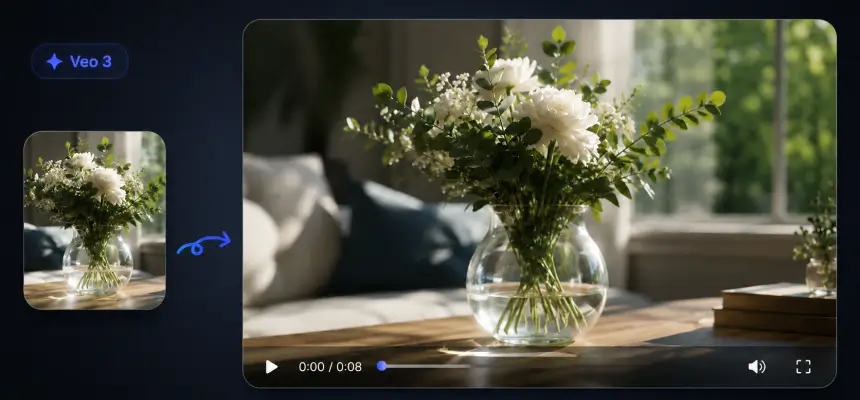
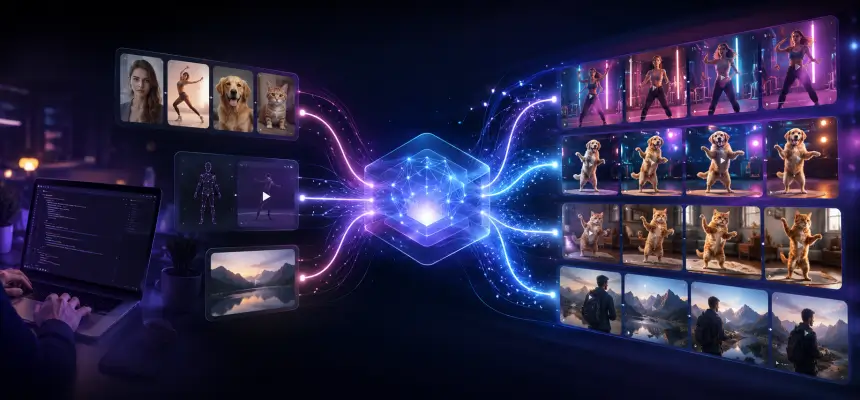
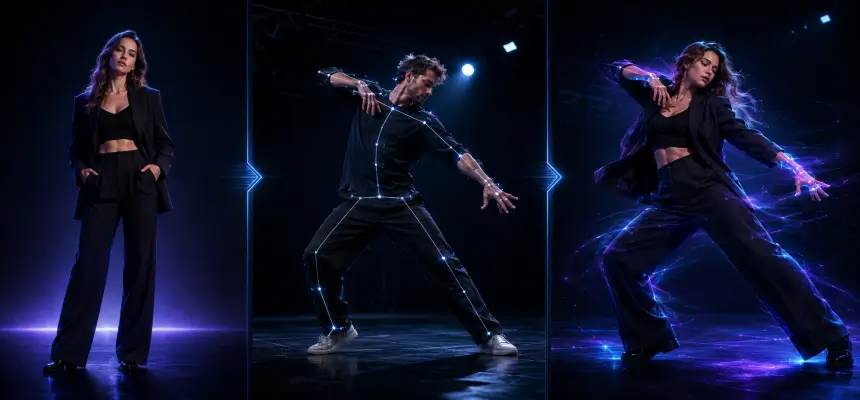

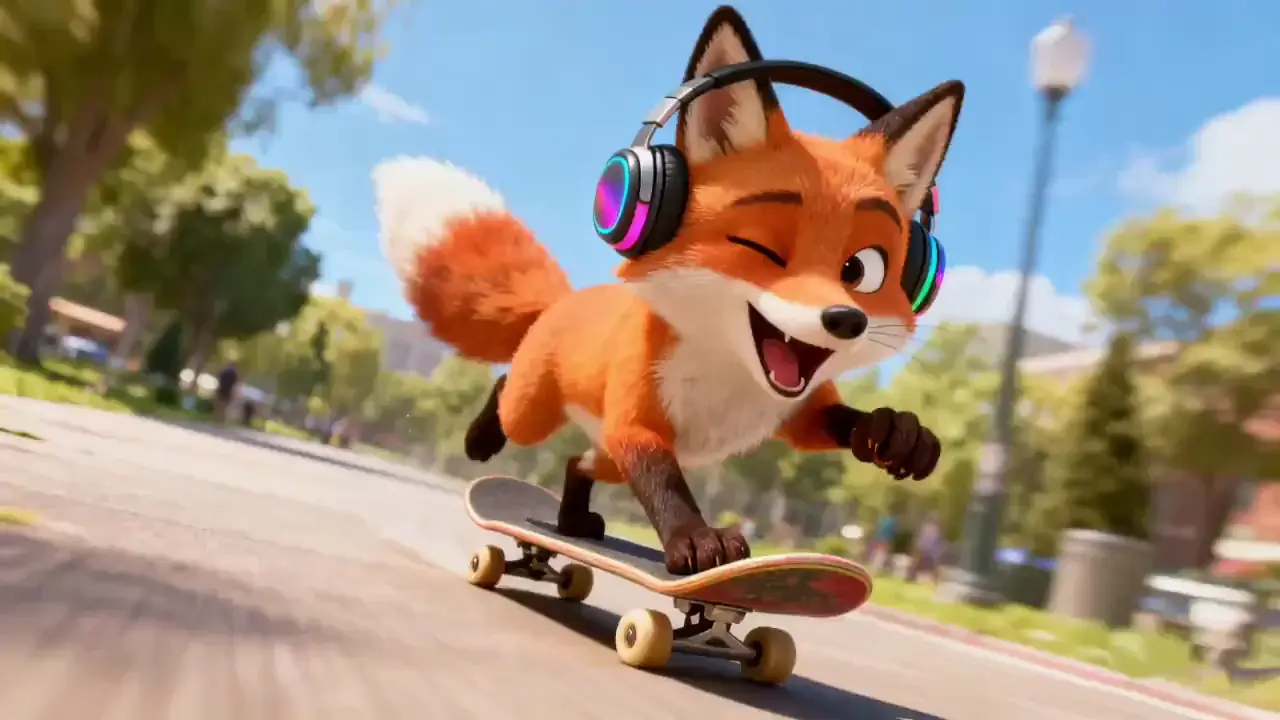
Melhor imagem para vídeo AI: gerador de imagem AI para vídeo gratuito para todos, sem login

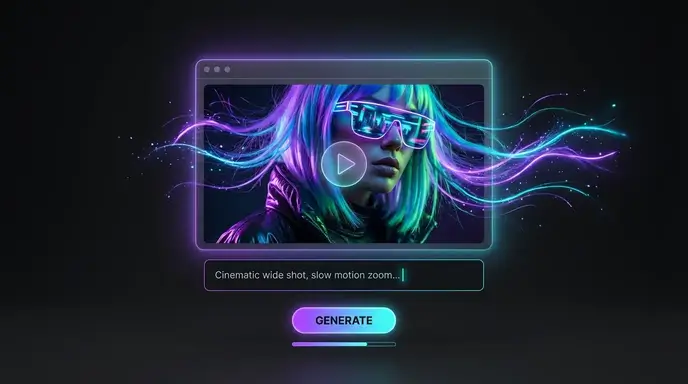
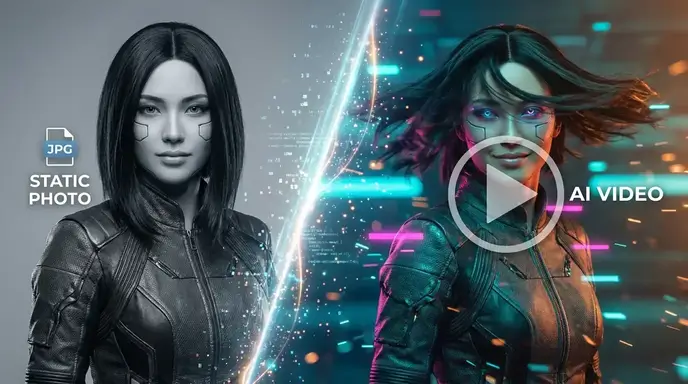
Crie animações impressionantes com nosso Gerador de Vídeo IA. Transforme fotos estáticas em movimento usando a tecnologia de Imagem para Vídeo de Inteligência Artificial — perfeita para mídias sociais, marketing e contação de histórias criativa.

Recursos Populares

Modelo
Video Fast 1.5 Lite Free
Qualidade de vídeo premium — clipes de 3 segundos grátis para experimentar. Disponibilidade por tempo limitado.
Prompt
0 / 1500
Áudio
Extensão avançada do promptNovo
Expandir Prompt
Duração
3s
Resolução
720p
1080p
Número de Resultados
Criar
Vídeo de Exemplo
Sample video preview

Gerador de Imagem para Vídeo com IA Online — Transforme Qualquer Foto em um Vídeo Cinematográfico em Segundos

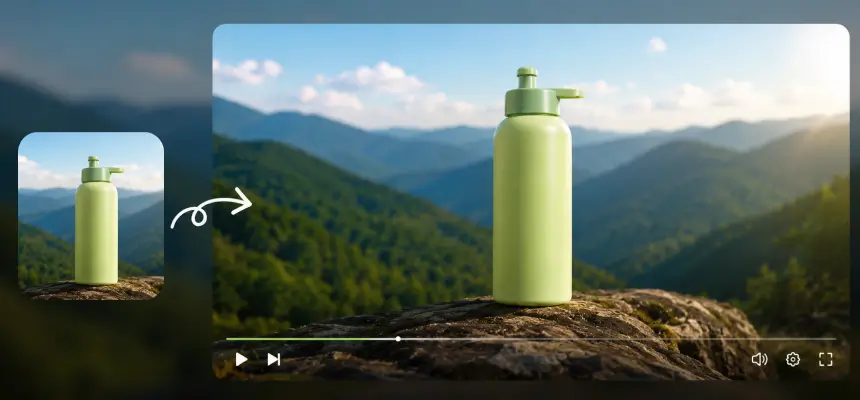
Anime imagens estáticas com movimento inteligente e efeitos adaptados à cena, impulsionados por modelos de IA de última geração. Envie uma foto de produto, retrato ou arte conceitual, descreva o movimento que você imagina e veja a transformação de foto para vídeo acontecer em tempo real. Nosso motor de IA de imagem para vídeo oferece animações fluidas com exportação 1080p sem marca d'água para todos os formatos no YouTube, TikTok e Instagram. Não precisa de software de edição — apenas uma imagem e uma ideia.
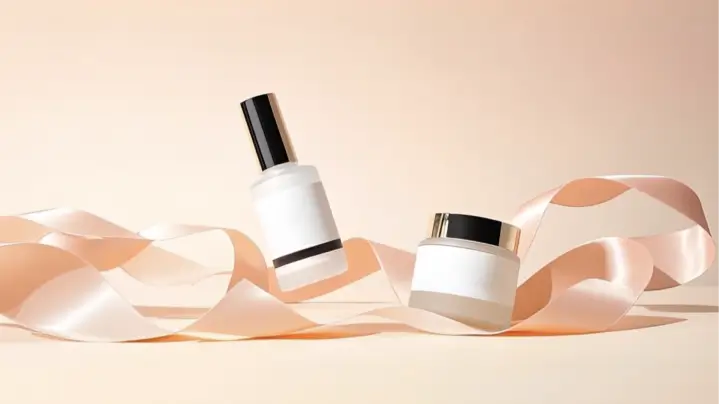
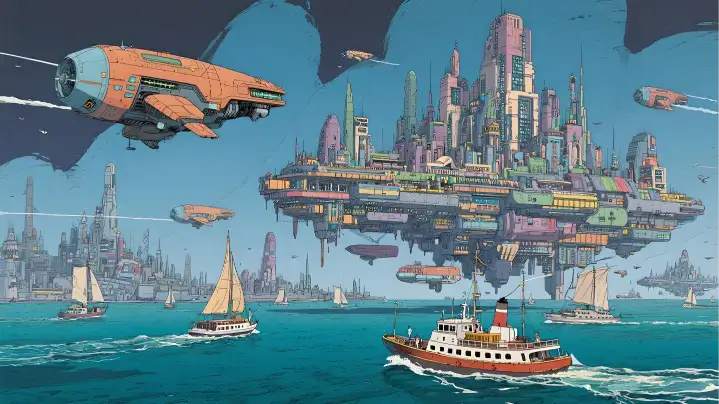
Imagem Original
Prompt
Dois produtos minimalistas de cuidados com a pele dispostos em uma fita fluida, em suas superfícies lisas, enquanto o foco é mantido nas tampas pretas e metálicas, suaves tons de rosa se misturam perfeitamente ao fundo com sutis efeitos bokeh.
Vídeo de Exemplo
Imagem Original
Prompt
Um veleiro movido a energia solar desliza pelos pilares de sustentação de uma cidade flutuante, suas velas capturando a luz prismática refratada através da arquitetura cristalina. Em um deque de observação no alto, uma multidão se reúne para observar drones de manutenção alados realizando reparos sincronizados. A câmera avança através do telhado transparente da biodomo da cidade, revelando jardins verticais e vendedores ambulantes flutuantes vendendo lanches luminosos para pilotos de hoverbike que passam.
Vídeo de Exemplo
Imagem Original
Prompt
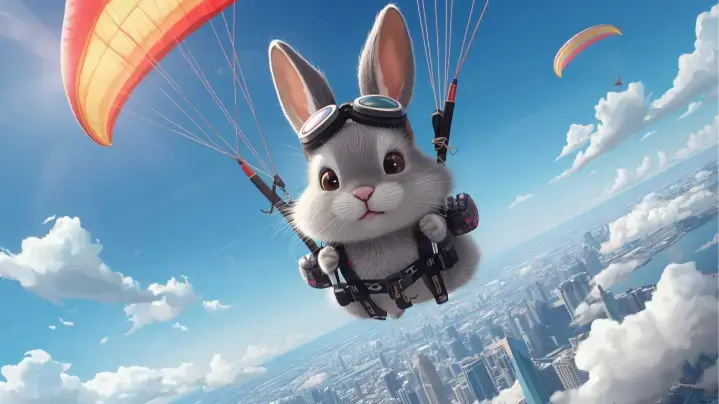
O coelho aventureiro ajusta os controles de seu parapente no ar, causando leves mudanças de altitude sobre a movimentada cidade abaixo. A câmera segue o movimento do sujeito lateralmente, capturando telhados coloridos e veículos minúsculos se movendo entre edifícios enquanto nuvens fofas flutuam lentamente ao fundo.
Vídeo de Exemplo

Principais Recursos da IA de Imagem para Vídeo

Descubra o poder da tecnologia IA de Imagem para Vídeo, transformando fotos estáticas em vídeos dinâmicos e de alta qualidade com facilidade e criatividade.

Opções Visuais Versáteis com a IA de Imagem para Vídeo

Com nossa IA de imagem para vídeo, você pode explorar infinitas direções criativas. Se você deseja converter foto em vídeo para contação de histórias, marketing ou design, a plataforma adapta estilos perfeitamente, tornando-a o criador de imagem para vídeo mais versátil para todos os criadores.

Gerar Vídeo a Partir de Imagens

Prompts de Múltiplas Entradas: Imagem e Texto

Emparelhe sua foto com prompts de texto descritivos para guiar a IA, como usar um Gerador de IA de Texto para Vídeo simultaneamente. Se você deseja movimento cinematográfico, paisagens naturais ou efeitos artísticos, a combinação de imagem + texto garante o máximo controle criativo e resultados mais personalizados.

Gerar Vídeo a Partir de Imagens

Saída de IA de Imagem para Vídeo HD Sem Marca D'Água

Nossa ferramenta oferece clipes polidos e de nível profissional. Usando um Gerador de IA de Imagem para Vídeo gratuito, você pode criar resultados HD impressionantes sem marcas d'água. Perfeito para marcas, artistas e criadores de conteúdo que buscam saída de imagem para vídeo de alta qualidade sem as restrições típicas.

Gerar Vídeo a Partir de Imagens

Como posso criar Vídeos a partir de Fotos com o Gerador de IA de Imagem para Vídeo?

Envie Sua Imagem para Criação de Vídeo IA

Comece enviando a foto (JPG, PNG ou WEBP) que você deseja animar. Você também pode cortar ou enquadrar a imagem para se ajustar à proporção de vídeo desejada para obter os melhores resultados.

Digite um Prompt e Personalize Seu Vídeo

Insira uma breve descrição para guiar o Gerador de IA de Texto para Vídeo (ou você pode deixar em branco). Ajuste opções como o modelo de IA, duração do vídeo, resolução e quantidade de saídas. Isso lhe dá controle total para criar vídeos exclusivos e de alta qualidade que correspondam à sua visão.

Clique em "Gerar" e Aguarde a Exportação

Clique e permita que a IA renderize uma pré-visualização. Revise o movimento, o tempo, os efeitos — e faça ajustes de ajuste fino, se necessário, antes de gerar o vídeo de IA a partir de fotos ou imagens. Você pode ver uma versão rápida antes de exportar a saída completa.

Casos de Uso Inovadores da IA de Imagem para Vídeo

Explore como o Gerador de IA de Imagem para Vídeo dá vida a casos de uso inovadores. Com nossa ferramenta, você pode facilmente transformar qualquer foto em movimento, criando vídeo de IA a partir de imagem para marketing, design, contação de histórias e conteúdo de mídia social.

Fotos em Movimento
Anúncios Dinâmicos
Demonstrações de Apresentação
Histórias de Viagem

Dê Vida a Fotos Estáticas com Movimento

Transforme imagens estáticas em vídeos vibrantes que realmente cativam seu público. Perfeita para vitrines de produtos, retratos ou contação de histórias criativa, nossa IA permite que você crie facilmente vídeo a partir de fotos. Em vez de visuais planos, você obtém conteúdo dinâmico que parece vivo e está pronto para o engajamento nas mídias sociais.

Perspectivas do Usuário sobre a IA de Imagem para Vídeo

Melhor IA de Imagem para Vídeo para Iniciantes: Fácil, Rápida e Intuitiva

Não sou muito experiente em tecnologia, mas achei o uso disso sem esforço. Em comparação com ferramentas como Vidnoz AI Image to Video ou Kling AI Video Generator, esta plataforma é muito mais intuitiva. Eu simplesmente enviei uma imagem, adicionei um prompt curto e a IA criou um vídeo incrível instantaneamente. Até iniciantes como eu podem lidar com isso com facilidade!

Maya Rodriguez
Usuária Iniciante

Gerador de Vídeo IA a Partir de Imagem: Simplifique o Marketing em Minutos

Como Gerente de Marketing, estou sempre com pouco tempo, e esta plataforma é uma salvação. Funciona como um gerador de IA de imagem para vídeo gratuito, permitindo-me transformar fotos de produtos em clipes polidos em minutos. Os resultados parecem profissionais, e ter um gerador de vídeo IA gratuito online com créditos de teste facilitou o teste antes de atualizar.

Liam Johansson
Gerente de Marketing

A Ferramenta de IA de Imagem para Vídeo que Todo Designer Criativo Vai Amar

Eu adoro a facilidade com que é criar vídeo a partir de imagens de minhas ilustrações com esta ferramenta. A IA lida com o trabalho pesado, enquanto eu posso ajustar o movimento, o ritmo e o estilo até que tudo pareça perfeito. Isso me economiza horas de edição manual e me ajuda a criar conteúdo de mídia social envolvente e com aparência profissional sem esforço.

Sophie Turner
Designer

Transforme Fotos Imobiliárias em Passeios Cinematográficos de Propriedades

Como corretora de imóveis, eu costumava gastar horas editando tours em vídeo. Agora, eu simplesmente envio as fotos da propriedade, e a IA as transforma em clipes de exibição elegantes com panorâmicas suaves e iluminação natural. Isso ajuda os clientes a visualizarem o espaço instantaneamente e aumenta o engajamento nas listagens.

Gabriela Santos
Corretora de Imóveis

Melhor Ferramenta de Imagem para Vídeo para Transformar Fotos em Clipes Virais

Como influenciadora de mídia social, estou sempre correndo contra o tempo para postar algo novo e atraente. Esta ferramenta de IA transforma minhas fotos estáticas em vídeos curtos vibrantes em minutos — sem necessidade de habilidades de edição. As animações parecem suaves, as transições parecem naturais e meu engajamento literalmente dobrou desde que comecei a usá-la. É como ter um editor em tempo integral no meu laptop.

Ava Reyes
Influenciadora de Mídia Social

Aumente as Vendas de Produtos com Ferramentas de Animação de Foto para Vídeo

Gerenciar uma loja Shopify significa que os visuais podem fazer ou quebrar suas conversões. Estas ferramentas de animação de foto para vídeo me ajudaram a criar vídeos promocionais impressionantes diretamente de minhas imagens de produtos. Os resultados parecem profissionais, e notei uma taxa de cliques mais alta em anúncios e listagens. É rápido, fácil e perfeito para quem não tem tempo para edição de vídeo complexa.

Leo Martens
Dono de Loja Shopify

Melhor IA de Imagem para Vídeo para Iniciantes: Fácil, Rápida e Intuitiva

Não sou muito experiente em tecnologia, mas achei o uso disso sem esforço. Em comparação com ferramentas como Vidnoz AI Image to Video ou Kling AI Video Generator, esta plataforma é muito mais intuitiva. Eu simplesmente enviei uma imagem, adicionei um prompt curto e a IA criou um vídeo incrível instantaneamente. Até iniciantes como eu podem lidar com isso com facilidade!

Maya Rodriguez
Usuária Iniciante

Gerador de Vídeo IA a Partir de Imagem: Simplifique o Marketing em Minutos

Como Gerente de Marketing, estou sempre com pouco tempo, e esta plataforma é uma salvação. Funciona como um gerador de IA de imagem para vídeo gratuito, permitindo-me transformar fotos de produtos em clipes polidos em minutos. Os resultados parecem profissionais, e ter um gerador de vídeo IA gratuito online com créditos de teste facilitou o teste antes de atualizar.

Liam Johansson
Gerente de Marketing

A Ferramenta de IA de Imagem para Vídeo que Todo Designer Criativo Vai Amar

Eu adoro a facilidade com que é criar vídeo a partir de imagens de minhas ilustrações com esta ferramenta. A IA lida com o trabalho pesado, enquanto eu posso ajustar o movimento, o ritmo e o estilo até que tudo pareça perfeito. Isso me economiza horas de edição manual e me ajuda a criar conteúdo de mídia social envolvente e com aparência profissional sem esforço.

Sophie Turner
Designer

Transforme Fotos Imobiliárias em Passeios Cinematográficos de Propriedades

Como corretora de imóveis, eu costumava gastar horas editando tours em vídeo. Agora, eu simplesmente envio as fotos da propriedade, e a IA as transforma em clipes de exibição elegantes com panorâmicas suaves e iluminação natural. Isso ajuda os clientes a visualizarem o espaço instantaneamente e aumenta o engajamento nas listagens.

Gabriela Santos
Corretora de Imóveis

Melhor Ferramenta de Imagem para Vídeo para Transformar Fotos em Clipes Virais

Como influenciadora de mídia social, estou sempre correndo contra o tempo para postar algo novo e atraente. Esta ferramenta de IA transforma minhas fotos estáticas em vídeos curtos vibrantes em minutos — sem necessidade de habilidades de edição. As animações parecem suaves, as transições parecem naturais e meu engajamento literalmente dobrou desde que comecei a usá-la. É como ter um editor em tempo integral no meu laptop.

Ava Reyes
Influenciadora de Mídia Social

Aumente as Vendas de Produtos com Ferramentas de Animação de Foto para Vídeo

Gerenciar uma loja Shopify significa que os visuais podem fazer ou quebrar suas conversões. Estas ferramentas de animação de foto para vídeo me ajudaram a criar vídeos promocionais impressionantes diretamente de minhas imagens de produtos. Os resultados parecem profissionais, e notei uma taxa de cliques mais alta em anúncios e listagens. É rápido, fácil e perfeito para quem não tem tempo para edição de vídeo complexa.

Leo Martens
Dono de Loja Shopify

Notícias

How to Create a Interior Design Video: AI Prompts for Real Estate

How to Create a Interior Design Video: AI Prompts for Real Estate

AI-generated interior design images can help clients visualize a finished space, but a static render does not always bring visual imapct to your clients that how the design transforms the original property. A renovation video makes that change easier to understand by showing a raw or unfinished room gradually becoming a fully furnished interior. This guide shows interior designers how to create that transformation with an AI Image-to-Video tool. You will learn two practical workflows, how to write effective AI prompts for interior design, and how to preserve the room’s original structure, camera angle, and perspective throughout the video. How AI Is Changing Interior Design Presentations When walls receive their finishes, flooring appears, built-in cabinets take shape, furniture enters the space, and lighting completes the final reveal, a clearer connection between the current property and the suggested design is being created. From Static Showcases to Renovation Videos A raw-to-renovated video gives the proposal a simple visual narrative: it begins with the actual room, follows the renovation process, and ends with the completed design. This format is especially useful for design proposals, renovation consultations, real estate listings, portfolio presentations, and social media. It can communicate materials, layout decisions, furniture placement, and atmosphere more quickly than a collection of separate images. More importantly, the intuitive before-and-after comparison helps customers make faster and more confident decisions. What You Need to Make A Interior Design Video Before starting, prepare a clear photo of the unfinished or existing space. The walls, doors, windows, ceiling, and floor should be visible with minimal obstruction. You should also define the intended interior style, main materials, color palette, furniture layout, lighting, and any architectural features that must remain unchanged. You do not need to pay for AI interior design tool and editing platform seperately. A capable AI Image-to-Video tool with image generation and start-and-end-frame support can handle the entire workflow. Method 1: Create the Video from the Original Image This method uses one photo of the unfinished or existing room. The AI Image-to-Video tool generates both the renovation process and the finished interior in a single video. It is the faster option, but the final layout may be less predictable because the AI is controled by prompts only. Step 1: Upload the Original Room Image Choose a clear photo that shows the full space. Important architectural features such as walls, doors, windows, columns, and ceiling lines should be easy to see. For better results: The clearer the source image is, the easier it is for the AI to understand the room. Step 2: Write AI Prompts for Interior Design Transitions Your prompt should describe both the renovation process and the final design. Start with the elements that must remain unchanged, then add the interior style, materials, furniture, lighting, and movement. Example prompt: Transform this unfinished room into a completed modern interior. Keep the original room layout, walls, windows, doors, ceiling height, camera angle, framing, and perspective unchanged. Gradually add finished walls, wood flooring, built-in cabinets, furniture, curtains, warm lighting, and realistic decor. Show a smooth renovation process and end with a photorealistic finished interior. Avoid describing too many unrelated design ideas in one prompt. A clear and consistent style usually produces a more stable result. Useful control phrases include: Step 3: Generate the Raw-to-Renovated Video Select Image-to-Video mode and generate a short test first. A duration of five to eight seconds is usually enough to check whether the room structure remains stable. Review the result carefully. Check whether: When the result is too fast or chaotic, simplify the prompt. Ask the AI to complete the room in clear stages, such as surfaces first, fixed furniture second, and soft furnishings last. Tips for Better Results This method works best when the source room is simple and clearly photographed. It is suitable for quick concept videos, early client discussions, and social media previews. However, it offers less control over the final design. The AI may change the layout, create unexpected furniture, or alter the camera angle. For projects that require a specific design proposal, use the start-and-end-frame method instead. Method 2: Use Start and End Frames This method uses two images: the original room as the start frame and the completed design as the end frame. The AI generates the renovation transition between them. It requires one additional image-generation step, but it gives interior designers more control over the final result. Step 1: Generate the Finished Interior from the Same Angle Upload the original room image to our AI image generator and describe the finished design. Clearly tell the AI to renovate the existing space rather than create a new room. Prompt Keywords: Convert this unfinished room into a fully renovated Scandinavian interior. Keep the exact original camera angle, framing, lens perspective, wall positions, windows, doors, ceiling height, and room proportions. Add warm white walls, light oak flooring, natural wood furniture, an open kitchen, soft lighting, curtains, and minimal decor. Create a photorealistic interior photograph, not a 3D render. The finished image should look like the same room after renovation. Do not accept a result simply because the design looks attractive. It must also match the original architecture. Step 2: Upload the First Frame and End Frame The original image works as the first frame, and the renovated version as the end frame. Make sure that the two pictures are from the same angle without camera movement. Check the following details: If the finished image uses a different viewpoint, regenerate it. Even a small camera shift can cause walls, windows, and furniture to bend or move during the transition. You can strengthen the prompt with instructions such as: Keep the exact same composition and viewing angle. Do not crop, zoom, rotate, expand, or redesign the architectural structure. Step 3: Create the Renovation Transition Between Frames Set the original photo as the start frame and the finished interior as the end frame. Then write a prompt that focuses only on how the transformation should happen. Example prompt: Create a seamless and

Kimi K3 AI Review: Real Performance, Pricing, and Access in 2026

Kimi K3 AI Review: Real Performance, Pricing, and Access in 2026

Moonshot AI released Kimi K3 on July 16, 2026, positioning it as its most capable model so far. The headline specifications are substantial: 2.8 trillion total parameters, a 1-million-token context window, native multimodal understanding, and an unusually sparse Mixture-of-Experts architecture. Kimi K3 also reached first place on the Frontend Code Arena shortly after launch. However, it does not beat Claude Fable 5 or GPT-5.6 Sol across every evaluation, and its low per-token price does not always translate into a low final bill. This Kimi K3 review separates verified specifications from launch marketing and examines its benchmarks, API pricing, cost per completed task, current open-weight status, and the best ways to access it. What Is Kimi K3 AI? Kimi K3 is a large multimodal reasoning model developed by Beijing-based Moonshot AI. It is designed primarily for long-horizon coding, agentic knowledge work, visual software development, research, and tasks involving very large amounts of context. Moonshot describes K3 as the first open model in the three-trillion-parameter class. Its architecture activates only 16 of 896 experts for each token, allowing the model to use a small portion of its total parameter capacity at any one time. Kimi K3 specifications at a glance Specification Kimi K3 Developer Moonshot AI Release date July 16, 2026 Total parameters 2.8 trillion Active experts 16 of 896 Context window 1,048,576 tokens Architecture MoE, Kimi Delta Attention, Attention Residuals Supported input Text, images, and video Output Text API model ID kimi-k3 Thinking modes Low, high, and max Default thinking level Max Full model weights Scheduled by July 27, 2026 K3’s API accepts text, image, and uploaded video inputs, although its output remains text-only. It also has an always-on reasoning system: thinking cannot be completely disabled, but developers can reduce it by setting reasoning_effort to low. Is Kimi K3 open source? Not yet in the practical sense. Moonshot has committed to releasing the full weights by July 27, 2026. Until those files and their final license are published, users cannot independently download, inspect, fine-tune, or self-host the full model. Therefore, the most accurate description as of July 23 is: Kimi K3 is an API-accessible model with a scheduled open-weight release. Calling it fully open source is premature because model weights alone do not necessarily include the training data, complete training pipeline, or all production infrastructure. Artificial Analysis currently classifies K3 as proprietary because the weights are not yet available. How Good Is Kimi K3? Independent Benchmarks and Limitations Kimi K3 is a near-frontier model, but its performance is uneven. Its strongest results appear in frontend development, long-running agent tasks, and analytical knowledge work. Its main disadvantages are speed, token usage, and reliability. Kimi K3 benchmark results Evaluation Kimi K3 result Frontend Code Arena 1,679 Elo, ranked #1 at launch Artificial Analysis Intelligence Index 57, currently #4 of 186 GDPval-AA v2 1,668 Elo AutomationBench-AA 53%, ranked #1 at launch AA-Briefcase 1,543 Elo, second behind Fable 5 K3’s first-place Frontend Code Arena result is significant because the leaderboard uses blind human evaluation rather than vendor-selected test cases. It reportedly ranked first in six of seven frontend categories, including design-oriented and reference-based interface work. Artificial Analysis currently gives K3 an Intelligence Index score of 57. That places it among the leading models tested, but still behind the highest-performing proprietary systems. Its agentic knowledge-work performance is particularly strong: on AA-Briefcase, it ranked second behind Claude Fable 5 and ahead of GPT-5.6 Sol and Claude Opus 4.8. Where Kimi K3 performs best K3 is especially well suited to: Moonshot’s own evaluations also emphasize GPU programming, CAD, game development, visual software iteration, and scientific coding. These vendor-run demonstrations are useful examples, but they should not be treated as independent proof of general performance. Kimi K3 limitations It is slow. Artificial Analysis measured approximately 35.2 output tokens per second through Kimi’s first-party API, compared with a median of 70.5 tokens per second among similarly priced reasoning models. It is verbose. K3 generated approximately 130 million output tokens during the Artificial Analysis Intelligence Index evaluation, compared with a median of 63 million. High token usage can increase both cost and completion time. Reliability is not uniformly strong. On AA-Omniscience, K3’s measured hallucination rate was 51%, up from 39% for K2.6. This is a benchmark-specific result rather than a universal hallucination rate, but it indicates that high reasoning ability does not automatically guarantee factual reliability. Long agent tasks may take too long. K3 averaged 56.4 minutes and 83 turns per task on AA-Briefcase, using roughly 120,000 output tokens per task. Moonshot also warns that K3 can become unstable when a tool or agent framework fails to preserve its previous reasoning history. The model may also act too proactively when instructions are ambiguous, making decisions that the user did not explicitly request. Kimi K3 Pricing: API Cost vs Cost per Task Kimi K3 uses flat API pricing across its full 1-million-token context window. Token type Price per 1M tokens Cached input $0.30 Uncached input $3.00 Output and reasoning $15.00 Context caching is automatic. Moonshot says its first-party API achieves cache-hit rates above 90% on coding workloads, although actual results depend on whether an application repeatedly sends the same prompt prefix or codebase context. Is Kimi K3 actually cheap? The answer depends on the task. On the broad Artificial Analysis Intelligence Index, K3 averaged approximately $0.94 per task. That was similar to GPT-5.6 Sol at $1.04 and lower than Claude Opus 4.8 at $1.80. In that evaluation, K3 offered relatively strong capability for its completed-task cost. However, on the more complex AA-Briefcase knowledge-work benchmark, K3 averaged $10.57 per task. Its high number of turns and output tokens made it more expensive than Opus 4.8 on that particular workload. The accurate conclusion is not that K3 is always cheap or always expensive: Kimi K3 has competitive token pricing, but its final cost depends heavily on reasoning length, agent turns, caching, and the type of task being completed. Kimi membership pricing Kimi currently lists four paid consumer plans: Plan Monthly price Agent credits

Higgsfield AI Earth Zoom Out: How to Create the Viral Effect

Higgsfield AI Earth Zoom Out: How to Create the Viral Effect

You’ve seen the clip: it pulls back from one person, past the rooftops, over the continent, all the way out to Earth hanging in space. The #EarthZoomOut trend has racked up over a billion views, and most of it is made with Higgsfield AI. But if you’ve actually tried it, you’ve probably hit the parts every tutorial skips — a paywall that appears mid-edit, a prompt that gives you a weird crossfade instead of a real zoom, no way to aim it at a specific place, and no clue where the “whoosh” sound comes from. This one page takes you from “what is this?” to a finished, polished clip: the honest free-vs-paid answer, the exact copy-paste prompt, how to zoom to a specific city, the reverse-clip trick, sound design, and free alternatives for when Higgsfield’s limits get in the way. What Is the Higgsfield AI Earth Zoom Out Effect? Before you open the tool, it helps to know exactly what the effect is doing and what it costs — because the “is it free?” question is the number-one friction point in every comment section. What the effect does (person → city → continent → Earth → space) The Earth Zoom Out is a single, continuous camera pull-back across wildly different scales. It starts tight on your subject, then retreats — past the street, above the city, over the continent, and finally out to the full curve of the planet against black space. The reason it reads as cinematic is that the motion never cuts. Higgsfield’s Earth Zoom Out motion preset simulates one physics-based camera path with satellite-style terrain, so the scale change feels earned rather than edited together. Why it’s going viral on TikTok, Reels & Shorts The effect works because it’s a scroll-stopping reveal. Within three seconds it recontextualizes a normal shot into something planetary, which is exactly what a feed algorithm rewards. Creators use it as an intro, an outro, or a transition between two scenes. The top tutorial on it pulled 166K+ views on YouTube alone — a good signal that the demand (and the search traffic) is real. Is Higgsfield AI Earth Zoom Out free? (free tier vs Pro) Here’s the honest answer, because “it’s not free!” is the most repeated complaint online: you can make it on the free plan, but with real limits, and some steps now sit behind Pro. Free plan Pro (~$9.99/mo) Videos/day ~2 Many more Model Lite Standard / Turbo Aspect ratio 16:9 16:9 + more Watermark Yes No Queue estimate ~45 min shown (often ~2–3 min real) Faster Key Takeaway: It’s genuinely free to try, but expect a watermark, 16:9 only, and a scary render estimate. The paywall usually surprises people at the prompt-enhance step — so don’t count on that feature staying free. How Do You Make an Earth Zoom Out Video in Higgsfield AI? The core workflow is four steps plus one decision. You can start from a single photo or from your video’s first frame — the click path is nearly identical. Step 1 — Open Higgsfield and select the Earth Zoom Out effect Open Higgsfield AI and find the Earth Zoom Out motion (it shipped as part of “Effects Pack 5”). Select it to start a new generation — this locks in the camera pull-back so you don’t have to describe the whole move from scratch. Step 2 — Upload a photo, or capture your video’s first frame For a photo, upload a clean, high-resolution image with a clear subject. For a transition from real footage, grab your video’s first frame as a screenshot and upload that instead. Using the first frame matters: it’s what keeps the AI-to-real seam tight when you stitch your footage back on later — a trick the r/Filmmakers community landed on as the reliable method. Step 3 — Add your prompt and choose a model (Lite / Standard / Turbo) Many creators report you can now “just generate” with no prompt, but a short prompt gives you far more control over the path and the destination (more on that below). Choose your model based on the trade-off: Lite is free and fast-enough, while Standard/Turbo improve quality and smoothness. Step 4 — Generate, then download your clip Hit generate. The interface may show a ~45-minute estimate — don’t panic; real render time is often 2–3 minutes. When it’s done, download your clip (free output is ~16:9 with a watermark). Photo-based vs video-based (first-frame) — which to choose If your goal is a TikTok that starts in space and drops into your actual video, go first-frame. What’s the Best Earth Zoom Out Prompt — and How Do You Zoom to a Specific Location? These are the two biggest gaps in the entire search results: a real, usable prompt (not one hidden behind a tool) and location control — the single highest-liked question nobody answers. The copy-paste prompt (with a subject-swap template) The trick is a progressive-scale prompt that names every altitude the camera passes through. Copy this and swap the subject line: Change only the bracketed subject to reuse it for any scene. How to zoom to a specific country, city, or coordinate To aim the zoom, name the location explicitly in the prompt — for example, “…until the camera reveals Tokyo, Japan, then the full Earth.” Pair that with a reference image whose framing already suggests that place, so the AI keeps the geography accurate. This is the query almost no competitor owns, so a clear method here is worth memorizing. Why your prompt gives a crossfade instead of a zoom (and the fix) If you get a soft crossfade rather than a true pull-back, your prompt is under-specifying motion. The fix: add “continuous camera dolly-out, no cross-dissolve, no fade” and describe the intermediate scales. For a “weird North America” or unrealistic globe, add “realistic satellite terrain, accurate continents” and use a cleaner reference image. How Do You Make the Earth Zoom Out Look Seamless and Cinematic? A raw generation is only half the job. The polish — reverse, speed, sound, color — is what turns it into a share-worthy clip. The reverse-clip trick to turn zoom-out into a seamless zoom-in Generate the zoom-out, then reverse the clip in your editor (CapCut, DaVinci

How to Make an AI Face Punch Video From a Photo (Beginner’s Guide)

How to Make an AI Face Punch Video From a Photo (Beginner’s Guide)

You’ve seen those funny slow-motion clips where a face gets a cartoon-style punch and snaps right back — and you want to make one yourself. Good news: it looks hard, but it really isn’t. The tricky part for most beginners is knowing where to start. What do you type as a prompt? Why does the first try come out with a melted face or a punch that barely moves? Those little problems stop a lot of people before they even post a clip. This guide walks you through how to make an AI face punch video from a single photo — the exact steps, copy-paste prompts, and quick fixes for the usual hiccups. We’ll keep it light, comedic, and fictional the whole way, so your result gets laughs, not weird looks. How to Make an AI Face Punch Video From a Photo (Step by Step) Making an AI face punch video comes down to three simple moves: pick a photo, add the punch effect, then generate and download. Any online AI image-to-video tool can handle this, so you don’t need editing skills or expensive software. Here’s the beginner-friendly version, step by step. Step 1 – Pick or Upload Your Photo Start with a clear, front-facing photo where the whole face is visible and the lighting is good. Sharp images with one main subject give the AI the most to work with, so avoid blurry group shots or faces that sit tiny in the frame. Most tools accept common formats like JPG and PNG, so you can upload straight from your phone. One quick reminder: use your own image (more on that later). A crisp, well-lit photo is the single biggest factor in a photo to punch video that looks clean. Step 2 – Add the Punch Effect (Prompt or Template) Now you tell the tool what to do. Beginners have two easy paths here. The first is a ready-made punch template — if your tool offers one, just select it and you’re mostly done. The second is a short text prompt describing a funny, cartoon-style punch. Prompts give you more control over the vibe and the timing. Not sure what to type? Don’t worry — the copy-paste prompts in the next section drop straight in and work great as a starting point. Step 3 – Set Motion, Generate, Preview & Download Before you hit generate, set the motion intensity and pick a short duration — 3 to 5 seconds is the sweet spot for a punch. Keep the aspect ratio at vertical 9:16 so it’s ready for TikTok, Reels, and Shorts. Then generate, preview, and download. This is where a simple AI video effect from photo tool shines: platforms like AI Image to Video let you control motion and duration, then export a clean, watermark-free vertical clip. Generation usually takes about a minute, and you can always re-generate if the first result looks off. Key Takeaway: A sharp photo, a short 3–5s duration, and vertical 9:16 output are the three settings that make or break your first punch clip. Copy-Paste Prompts for a Funny AI Face Punch Video Prompts are the single most-requested asset for this effect — creators everywhere ask, “Just send me the prompt.” So here are three you can copy, paste, and tweak. Each one is framed as playful and fictional, with no gore or injury detail. Basic Face Punch Prompt (Copy-Paste) A cartoon-style fist enters from the side and lightly bonks the person’s face; the cheek squishes and springs back, exaggerated comedic reaction, funny meme style. The key words here are cartoon-style, squish, and comedic — they keep the clip goofy instead of realistic. Swap “from the side” for another direction, or change the reaction to match your subject’s expression. Slow-Motion Comedy Punch Prompt (Copy-Paste) Slow-motion comedic punch, soft cartoon impact on the cheek, face wobbles like jelly, motion blur on the fist, playful exaggerated expression, meme-style, 3 seconds. Slow motion is your friend. It stretches the funny moment out and makes the “hit” read clearly as a joke rather than something rough. The wobble and motion blur cues are what sell the exaggerated bounce. Cartoon / Meme-Style Punch Prompt (Copy-Paste) Stylized meme punch, big cartoon impact stars, springy face bounce, goofy surprised expression, bright colors, lighthearted and fictional. This is the most forgiving option. The impact stars and springy bounce lean fully into cartoon territory, which conveniently hides small realism flaws while keeping the clip clearly comedic. How to Make the Punch Look Natural (and Fix Common Problems) Even with a great prompt, your first AI punch video might miss the mark. The most common complaint creators have is that the punch “stops at skin contact” and never feels like it connects. A few small tweaks fix that fast. Tips to Make the Impact Look Natural The trick is timing the impact with the reaction. Sync the moment the fist reaches the cheek with the face starting to move — when those line up, the punch feels connected. Fix – Distorted or Melting Faces This usually means the photo is too small or blurry, or the motion is cranked too high. Use a sharper, well-lit image, lower the motion intensity, and keep the punch light before you re-generate. A stylized or cartoon prompt also hides minor distortion. Fix – Weak or No Punch Motion If nothing much happens, your prompt was probably too vague or the motion was set too low. Add clear action words like impact, snap, bounce, and recoil, nudge the motion intensity up a little, and name a direction — “fist enters from the left” — so the movement is obvious. Fix – Unnatural or Bad Punch Timing If the reaction lands too early or too late, the clip is often just too long. Keep it 3–5 seconds, ask for the reaction to happen “on impact,” and lean on slow motion so the timing looks intentional. If a generation still misses, re-roll — a couple of tries is normal. Keep It Fun, Fictional & Safe to Share A good face punch video effect is all about the laugh. A little care here keeps your content fun and safe to post anywhere. Keep It Comedic, Stylized & Fictional Lean into cartoon and meme framing

How to Make an AI Cat Dancing Video for Viral TikTok Clips

How to Make an AI Cat Dancing Video for Viral TikTok Clips

You scrolled past a cat nailing a full dance routine to trending audio and thought, “How do I make that?” Good news: you can turn a single cat photo into a dancing clip in about five minutes, no editing skills required. The tricky part is that most beginners don’t know which photo to use, which tool actually works, what to type as a prompt, or how to make the movement look like a real viral short instead of a stiff AI animation. Those are the exact roadblocks people complain about most. This guide is a simple, no-jargon walkthrough: choosing the right photo, making your cat dance with Motion Control or a prompt-only method, fixing the common glitches, and exporting a clean 9:16 video for TikTok, Reels, or YouTube Shorts. Two Ways to Make an AI Cat Dancing Video There are two simple ways to make your cat dance with AI: ● Motion Control — upload a short dance reference, such as a TikTok-style viral move, and the AI transfers that motion to your cat. This is the best option if you want a synced, trend-ready video that feels made for TikTok, Reels, or Shorts. ● Prompt Only — upload your cat photo and describe the dance in words. This method is faster and more flexible, but the motion is less controlled, so it works best for funny freestyle dances or quick meme-style clips. For the most viral-looking result, start with Motion Control. For the fastest test, use a prompt-only workflow. How to Create Your AI Cat Dance Video Step by Step Now let’s turn those two methods into a real workflow. Below, you’ll learn how to make a cat dancing video with Motion Control first, then how to create a freestyle version using only a prompt. Method 1: Use Motion Control for TikTok-Style Viral Moves If you want a more viral-looking AI cat dancing video, Motion Control is the best place to start. Instead of letting the AI invent the movement, you choose a built-in dance action and apply it to your cat. Step 1: Choose a Tool That Supports Motion Control Start with an image-to-video tool that supports Motion Control, so you can apply more precise dance movement to your cat video. Step 2: Upload Your Cat Photo Upload a clear, full-body cat photo. A front-facing image with visible legs and paws usually works best, because the AI needs to see the body clearly before it can animate the dance. Step 3: Pick a Built-In Viral Dance Move Next, choose a built-in dance action. Focus on short, loop-friendly moves inspired by TikTok trends, these types of motions usually work better than long or complicated choreography. Step 4: Set the Video Format and Generate Set the aspect ratio to 9:16 so the video fits TikTok, Reels, and Shorts. Then generate your video. Step 5: Preview and Refine Watch the result and check whether the cat stays consistent and the dance looks natural. If the motion feels too strong or unnatural, try a simpler built-in move and generate again. Method 2: Use Prompt Only for Freestyle Cat Dance Videos If you want a faster and more flexible way to make an AI cat dancing video, use the prompt-only method. Instead of choosing a fixed dance action, you describe the movement in words and let the AI generate it. Step 1: Upload Your Cat Photo Upload a clear, full-body cat photo. A sharp image with visible legs and paws gives the AI a better base for dance movement. Step 2: Set the Video Format Choose the 9:16 aspect ratio so your video fits TikTok, Reels, and Shorts. Keep the clip length around 6–12 seconds for a short, loop-friendly result. Step 3: Write Your Dance Prompt Describe the dance as clearly as possible. A good prompt should include the dance move, camera behavior, facial expression, and ending pose. For example: [your cat] + [specific dance move] + [camera behavior] + [facial expression] + [ending pose] Avoid vague prompts like “cat dancing,” because they often lead to random or unnatural motion. Step 4: Generate the Video Once your prompt is ready, generate the video and wait for the preview. Step 5: Preview and Refine Watch the result and check whether the movement looks natural and the cat stays consistent. If the body looks warped, lower the motion intensity. If the face or fur markings change too much, shorten the clip or generate again. Copy-Paste Prompts for Your AI Cat Dance Video Prompts are the single highest-engagement thing readers ask for — and the easiest to get wrong. Here is a formula plus ready-made prompts you can paste straight in. The Simple Cat Dance Prompt Formula Use this fill-in-the-blank structure: [your cat] + [specific dance move] + [camera behavior] + [facial expression] + [ending pose] Naming the exact move and expression keeps the motion believable and the cat “on model.” Vague prompts like “cat dancing” give the AI too much room to invent, which is when things get weird. Prompt for a TikTok-Style Viral Cat Dance “An orange tabby cat standing on two legs doing a short viral TikTok-style dance, bouncy side-step motion, paws moving to the beat, tail swaying naturally, playful happy expression, vertical 9:16 frame, static camera, ends in a confident cute pose.” Prompt for a Hip-Hop Cat Dance “An orange tabby cat standing on two legs doing a smooth hip-hop dance, bouncing to the beat, tail swaying naturally, happy expression, static camera, ends in a confident pose.” Prompt for a K-Pop Cat Dance “A fluffy grey cat performing an energetic K-pop-inspired dance, synchronized paw and body movements, cute confident face, vertical 9:16 frame, clean studio background, ends with a playful pose.” Prompt for a Moonwalk Cat Video “A black cat moonwalking backward like a pop dance performance, smooth glide, same fur pattern throughout, soft studio lighting, static camera, short loopable 8-second video.” Prompt for a Funny Meme Cat Dance “A chubby white cat doing a silly meme dance, small bouncy steps,

Runable AI Review 2026: Can One Agent Really Replace Your Entire Tool Stack?

Runable AI Review 2026: Can One Agent Really Replace Your Entire Tool Stack?

Be honest about where your workday goes. It’s rarely the thinking part. It’s the shuffle between ChatGPT, Canva, Webflow, and your inbox, copying one tool’s output into the next. Runable AI says it can fold that whole relay race into a single chat, and it backs the claim with a 92.1% score on the GAIA agent benchmark. The trouble is the search results. Most “reviews” are sponsored takes that gush about a demo, never quantify the credits, and skip the limits. So you’re left guessing whether Runable is a real do-it-for-you agent or just a louder chatbot. This review answers that: what Runable AI actually is, how it works, what it builds, real pricing and credit math, head-to-head comparisons, and the honest pros and cons — including the astroturfing question circling Reddit — so you can decide before spending a credit. What Is Runable AI? (And What It’s Not) Runable AI is a general AI agent: software that plans and carries out complete digital tasks from one instruction, rather than just talking about them. Think of it as the difference between an assistant who describes how to build a slide deck and one who hands you the finished file. Runable AI in one sentence (agent vs chatbot) A chatbot replies. Runable acts. It works across connected apps and a virtual computer, and Plan Mode lets you approve each step before it runs. That execution gap is the whole point — and the lens for everything below. Runable vs Run:ai vs LangChain “Runnable” vs runable.app The name causes real confusion, so let’s clear it fast. Runable AI lives at runable.com (and runableai.com) and is the agent in this review. Run:ai is a GPU and MLOps orchestration platform — unrelated. LangChain’s Runnable is a developer code interface, not a product you sign into. And runable.app is a separate privacy-focused software company that has nothing to do with the agent. If you searched “runable ai,” you almost certainly meant runable.com. Who Runable AI is built for Runable fits operators, marketers, agency owners, non-technical founders, freelancers, and students — anyone who deals with messy inputs and needs real deliverables out the other end. It’s a weaker pick for IDE-grade software engineering or for people who just want a chat partner. If your work is “make the thing,” you’re the target user. How Does Runable AI Work? Understanding the mechanics is what separates “real execution” from marketing copy. Runable runs on a repeatable loop and a sandboxed machine that does the actual clicking and building. The Plan → Visualize → Work → Iterate workflow The core loop is simple: Runable clarifies your intent, previews a plan, executes, then refines. The ask-questions-first habit matters more than it sounds — pinning down what “done” looks like before generating avoids the misaligned outputs that waste time and credits. Plan Mode and human-in-the-loop approval Plan Mode is the trust layer. Before Runable builds anything, it shows the plan to approve, and you can fork a project or roll back a version. That preview-before-build gate is your chance to catch a wrong turn before credits are spent — a real safeguard given how fast media generation drains your balance. The virtual computer, connectors, and brand memory Under the hood, Runable operates a virtual Ubuntu computer, so it can browse, run files, and complete multi-step jobs like a person at a keyboard. It links to outside apps through Connectors and stores a brand Memory for consistent fonts, colors, and tone. One honest caveat: the marketed “3,000+ connectors” leans heavily on Zapier-mediated links, with roughly 50 verified native integrations underneath. What Can You Actually Build With Runable AI? This is where Runable earns or loses its keep. The range is genuinely broad, and each format below maps to a job people search for directly. Slides and presentations Slides are a standout. Reviewers have watched it spin up 26-slide decks in seconds and full investor pitch decks from a short brief. The structure and speed are impressive; the templates can feel generic, so expect light editing to match a brand. Websites (including interactive and 3D) Websites are the most community-praised use case. Users report landing pages, portfolios, and even 3D or interactive sites “in minutes.” It’s excellent for prototyping and idea-testing. For pixel-level polish, many still finish in Webflow or Figma. Videos and UGC content Runable generates video through multiple models — Veo, Sora 2, Runway, Pika, Luma, and Kling — which is great for quick ads and UGC concepts. The big caveat: video burns credits faster than anything else. Because Runable’s clips are best treated as first drafts, it pairs well with a dedicated finisher. For watermark-free 4K social and TikTok clips built from images, a specialized tool like AI Image to Video is a natural complement for the final, polished export. Reports, deep research, and documents For research, Runable produces deep-research reports and long-form documents, and it points to DRACO Deep Research (68.3%) and BrowserComp positioning to justify the claim. Output is solid for a first pass; verify facts before anything ships to a client. Podcasts and AI audio The AI Audio suite covers podcast episodes, dubbing, voice swapping, and transcription. It’s a tidy fit for repurposing written content into audio without bouncing between separate apps. Workflow automation, connectors, and RunClaw Beyond one-off creation, Runable automates repetitive tasks and runs on schedules. RunClaw is its agent for Slack, Discord, and Telegram, executing jobs autonomously inside the chat tools your team already uses — the answer to the recurring “does it work in Slack?” question. Runable AI Pricing and Credits Explained (2026) Pricing is where competitors go vague, so here’s the concrete version. Note that reported tiers vary across sources; runable.com/pricing is the source of truth. Starter / Pro / Unlimited tiers and the $1 trial Plans are commonly reported as Starter ~$25/mo, Pro ~$50/mo, and Unlimited ~$200/mo, with some sources citing Plus/Pro variants near $29 and $49. A viral $1 entry promo has shown up in YouTube demos as a

Perguntas Frequentes sobre o Gerador de IA de Imagem para Vídeo

Existe uma opção gratuita de IA de Imagem para Vídeo?

Sim, nossa plataforma oferece um plano gratuito para que você possa experimentar o recurso de IA de Imagem para Vídeo sem riscos. Isso permite que você crie vídeo a partir de uma imagem, teste a funcionalidade principal, gere clipes curtos e decida se a atualização faz sentido para ferramentas mais avançadas ou saída de maior resolução. É uma ótima maneira de explorar a plataforma e ver os resultados imediatamente.

Qual é a melhor ferramenta de IA de Imagem para Vídeo?

A melhor IA de Imagem para Vídeo depende de seus objetivos — se você prioriza resultados de alta qualidade, estilos criativos ou saída rápida. Nosso Gerador de IA de Imagem para Vídeo permite converter imagem em vídeo sem esforço, tornando-o uma escolha confiável para criadores, profissionais de marketing e qualquer pessoa que queira dar vida a fotos estáticas.

Vocês integram o modelo Veo 3 ou outros mecanismos de IA?

Sim! Nossa plataforma integra modelos de IA líderes, incluindo Veo3, Kling AI Image to Video, Runway AI Image to Video e Wan Image to Video, oferecendo aos usuários múltiplas opções para criar vídeos dinâmicos e de alta qualidade a partir de imagens sem esforço.

Como criar vídeo com imagens?

A IA de Imagem para Vídeo usa modelos de aprendizado profundo para analisar sua imagem e adicionar movimento realista — como zooms, panorâmicas ou efeitos animados. Você simplesmente envia uma imagem, adiciona prompts ou preferências de estilo, e a IA a transforma em um clipe de vídeo dinâmico.

Vocês integram outros modelos de IA como o Veo 3?

Atualmente, nossa plataforma não oferece diretamente o Veo 3, Imagen 3, Pollo AI Image to Video ou o Gerador de Vídeo Luma AI. Embora alguns usuários também explorem ferramentas como Vidnoz AI Image to Video, estamos avaliando ativamente solicitações populares e planejando conectar com modelos mais avançados em futuras atualizações.

Existe uma opção de IA de Imagem para Vídeo sem conta?

Atualmente, você precisa criar uma conta para usar nosso Gerador de IA de Imagem para Vídeo. A boa notícia é que o registro é gratuito e vem com 50 créditos bônus, para que você possa testar a criação de imagem para vídeo imediatamente sem pagar. O registro também permite que você salve projetos, acesse saídas de maior qualidade e explore todos os recursos sem problemas.

Como posso criar resultados profissionais com a IA de Imagem para Vídeo gratuita?

Mesmo com a IA de Imagem para Vídeo gratuita, você pode alcançar resultados com aparência profissional usando nosso gerador de IA de foto para vídeo. Basta enviar imagens de alta qualidade, selecionar os estilos certos e pré-visualizar seu vídeo antes de baixar. A renderização suave e as exportações sem marca d'água garantem conteúdo polido sempre.