That insanely good AI animation look is not a secret model or a magic prompt. It is a workflow. Most AI animation looks cheap for one simple reason. People start with video settings first, then hope the story and visuals will stay consistent. In reality, quality comes from building reusable assets before you animate anything, then running a repeatable pipeline: text assets, image assets, video generation, and publishing.
This guide breaks down a proven process you can follow to create a short animated series with stable characters, stable style, and better pacing. If you only remember one thing, remember this. How to make insanely good animation using AI is mostly about consistency. Consistent characters, consistent environments, and consistent camera language. Once those are locked, you can confidently create animation using AI instead of gambling on random outputs.
What Insanely Good AI Animation Really Means
When people say an AI animation looks professional, they usually mean four things.
First, the character does not drift. The face stays the same across shots, the outfit stays recognizable, and the body proportions do not change. Second, the visual style stays stable. Your scenes do not jump between different rendering looks. Third, the pacing feels like real animation. The camera and motion support the story rather than creating noise. Fourth, emotions land. Expressions, gestures, and shot choices match the scene.
These are also the reasons people search for phrases like “why does my AI animation look fake” and “how to keep the same character in AI animation.” They are not really asking for a tool. They are asking for control.
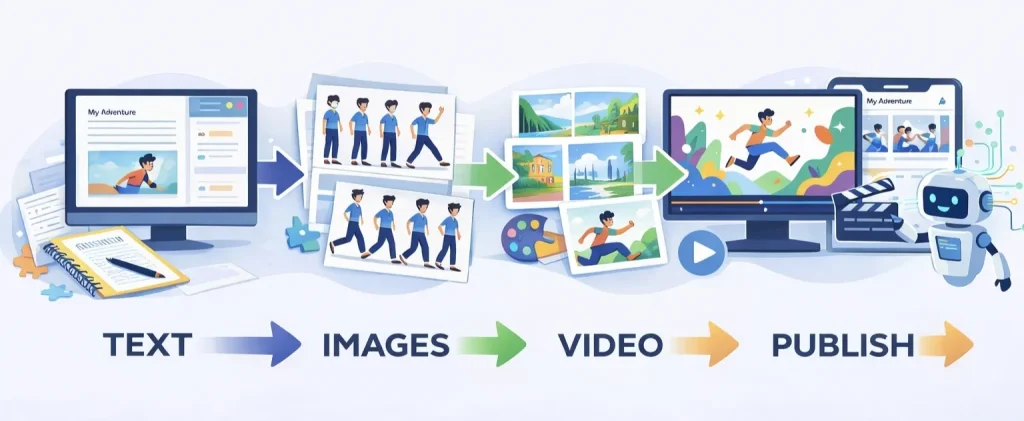
The Workflow Overview: Text to Images to Video to Publish
Here is the full loop you will run every time:
- Text assets: script, character asset sheet, storyboard beats, and prompt reverse engineering notes
- Image assets: character turnaround, environment library, and action frames for your shots
- Video generation: image-to-video or text-to-video with controlled motion
- Publishing: release like a series and iterate based on performance
This is how animation using AI becomes repeatable. It also makes your results look far more expensive.
Step 1: Build the Text Assets That Control Quality
Start with a script designed for short animation
AI tools are fast, but viewers are not patient. A strong short episode structure looks like this:
- Opening three seconds: a visual moment that forces attention
- Middle: conflict plus a steady flow of new information
- Micro twists: something shifts every few seconds
- Ending: a cliffhanger that makes the next episode hard to ignore
If you plan episodes around two minutes, aim for six to ten shots. Keep each shot focused on one purpose. One reveal, one reaction, one decision, one threat, one escape. This is the practical foundation of how to make insanely good animation using AI because story pacing is what makes animation feel intentional.
Create a character asset sheet
If you skip this, your character will drift. Even the best AI anime generator will not keep your character consistent unless you define what must stay the same.
Build a simple spec that you reuse every time:
- Identity: name, age range, personality in five words
- Face: eye shape, eyebrow style, nose type, lip shape, skin tone
- Hair: style, length, color, one signature detail
- Outfit: main color palette, materials, accessories
- Body: height, silhouette, proportions
- Non negotiables: details that never change
- Allowed variations: expressions, small pose changes, lighting differences
This sheet is your anchor. It turns your character from “a prompt” into a product you can reproduce. If your goal is to create animation using AI as a series, this is not optional.
Turn the story into beats and a shot list
Before you generate any images, write a mini shot list. This gives your animation clear structure.
For each shot, define:
- Shot type: close up, medium, wide
- Subject: who is in frame
- Action: what changes in this shot
- Emotion: what the viewer should feel
- Camera: static, slow push in, gentle pan
- Dialogue or subtitle: keep it short
This shot list becomes your production plan. It also reduces wasted generations because you are not guessing.
Reverse engineer prompts from a target look
If you have a reference frame you love, do not start by guessing prompts. Start by analyzing what you see, then build a prompt skeleton.
Focus on:
- Character design details and wardrobe
- Environment props and textures
- Lighting direction and mood
- Camera angle and composition
- Color palette and contrast
- Rendering style and material feel
Then write a base prompt that stays constant and only swap shot specific details, such as action and camera angle. This is one of the fastest ways to make animation using AI look more premium.
Step 2: Generate the Three Image Asset Types That Lock Consistency
Most beginners generate random cool images. That feels productive, but it creates chaos later. Instead, generate assets.
Asset 1: Character turnaround
Generate a turnaround, also called a three view reference. You want front, side, and back views. Add a neutral expression and two or three extra expressions if you can.
This solves the biggest issue in AI animation. It gives you a clear reference so every future shot looks like the same person. If you are using an AI anime generator, you can use it here to define the main character look.
Asset 2: Environment library
Pick five to eight recurring environments. Bedroom, office, hallway, café, street, car interior, and any signature location for your story.
Generate them in the same style and lighting rules. Do not reinvent the world every episode. Consistency is what makes an animated series feel real. This step alone makes it easier to create animation using AI without the style drifting.
Asset 3: Action frames for your shots
For each episode, generate three to six action frames based on your shot list. These frames represent key story beats and key reactions.
This also helps your later video step. You are animating from deliberate compositions rather than improvising motion at the last minute.
Step 3: Turn Frames Into Motion Without Making It Look Cheap
Image to video versus text to video
If you want stable characters and stable style, image to video is often the safer choice because the model starts from a fixed frame. Text to video can be great for exploration, but it can drift more.
If your main priority is “same character, same style,” start with image to video. If your priority is “surprise me with creative motion,” text to video can be useful.
This choice matters for anyone searching AI video to cartoon workflows. Stylizing a video can look amazing, but it becomes messy when motion is too large or faces drift.
Motion choices that look expensive
AI motion breaks when it is too aggressive. Small controlled movement tends to look more cinematic and more animated.
Use these rules:
- Keep camera moves subtle, such as slow push in or gentle pan
- Keep character motion small, such as head turn, blink, hand gesture
- Avoid fast full body movement unless your tool handles it well
- Use short clips, often two to four seconds per shot
Then stitch those shots together in an editor. You will get a cleaner result than trying to generate long continuous scenes.
Add sound to finish the illusion
A lot of AI animation feels like a demo because it is silent. Audio makes it feel real.
Use:
- Voiceover or dialogue
- One layer of ambience
- A few key sound effects
- Subtitles timed to beats
Even simple audio lifts perceived quality immediately.
Step 4: Publish Like a Series and Let Iteration Do the Work
Platforms reward consistency and retention more than one perfect clip. Build a simple schedule you can keep.
A beginner friendly plan:
- Week 1: lock one character, create turnaround, generate five environments
- Week 2: produce three short episodes using the same assets
- Week 3 and beyond: batch produce with the same template, then improve hooks and pacing
This approach turns create animation using AI into a repeatable content engine.
Common Mistakes That Make AI Animation Look Bad
- Skipping the character asset sheet so every shot changes the face
- Generating new environments every time so the style drifts
- Animating before planning shots so pacing becomes random
- Using too much motion so the model breaks anatomy and faces
- Ignoring audio so the result feels unfinished
Fix the first two and you will see a huge jump in quality.
Quick Checklist to Make Insanely Good AI Animation
If your goal is how to make insanely good animation using AI, run this checklist before you generate video:
- Character turnaround created and saved
- Character asset sheet written and reused
- Environment library created and reused
- Shot list written for the episode
- Action frames generated for key beats
- Video motion kept subtle and clips kept short
- Audio and subtitles added
- Publish schedule planned as a series
FAQ
What is the easiest way to create animation using AI as a beginner?
Follow the four steps: build text assets, build image assets, generate short video clips, then publish as a series. Beginners fail when they skip the asset stage.
Can an AI anime generator make a full episode?
An AI anime generator can produce strong frames, but a full episode needs consistency. Use it to create stable characters and stable environments, then animate those frames.
Why does my AI animation look fake?
Most of the time it is inconsistency. Faces drift, style changes, and motion is too strong. Lock assets first, then animate with subtle movement.
Can I use AI video to cartoon tools for this?
Yes. AI video to cartoon tools can help stylize footage, but you still need controlled motion and stable characters. Subtle motion and short clips usually look best.
Conclusion
You do not need perfect tools to make high quality AI animation. You need a stable pipeline. When you treat characters and environments like assets, your animation stops looking like random generations and starts looking like a real series.
If you want to turn your best frames into motion fast, you can use our Image to video tool to convert your character shots and storyboard frames into short, controllable clips. Start with your locked character turnaround and your key action frames, generate a few seconds per shot, then stitch them together into a clean episode cut. This simple loop makes it easier to create animation using AI consistently, especially when you are iterating on style and pacing across a series.