Your sketch is already a better prompt than any paragraph you could write — but only if you prepare it correctly. Most beginners upload a rough drawing, type a vague prompt, and get a result that looks nothing like what they drew. The AI reinterprets the composition, adds unwanted details, or produces flickering artifacts.
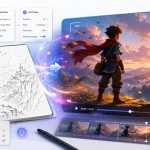
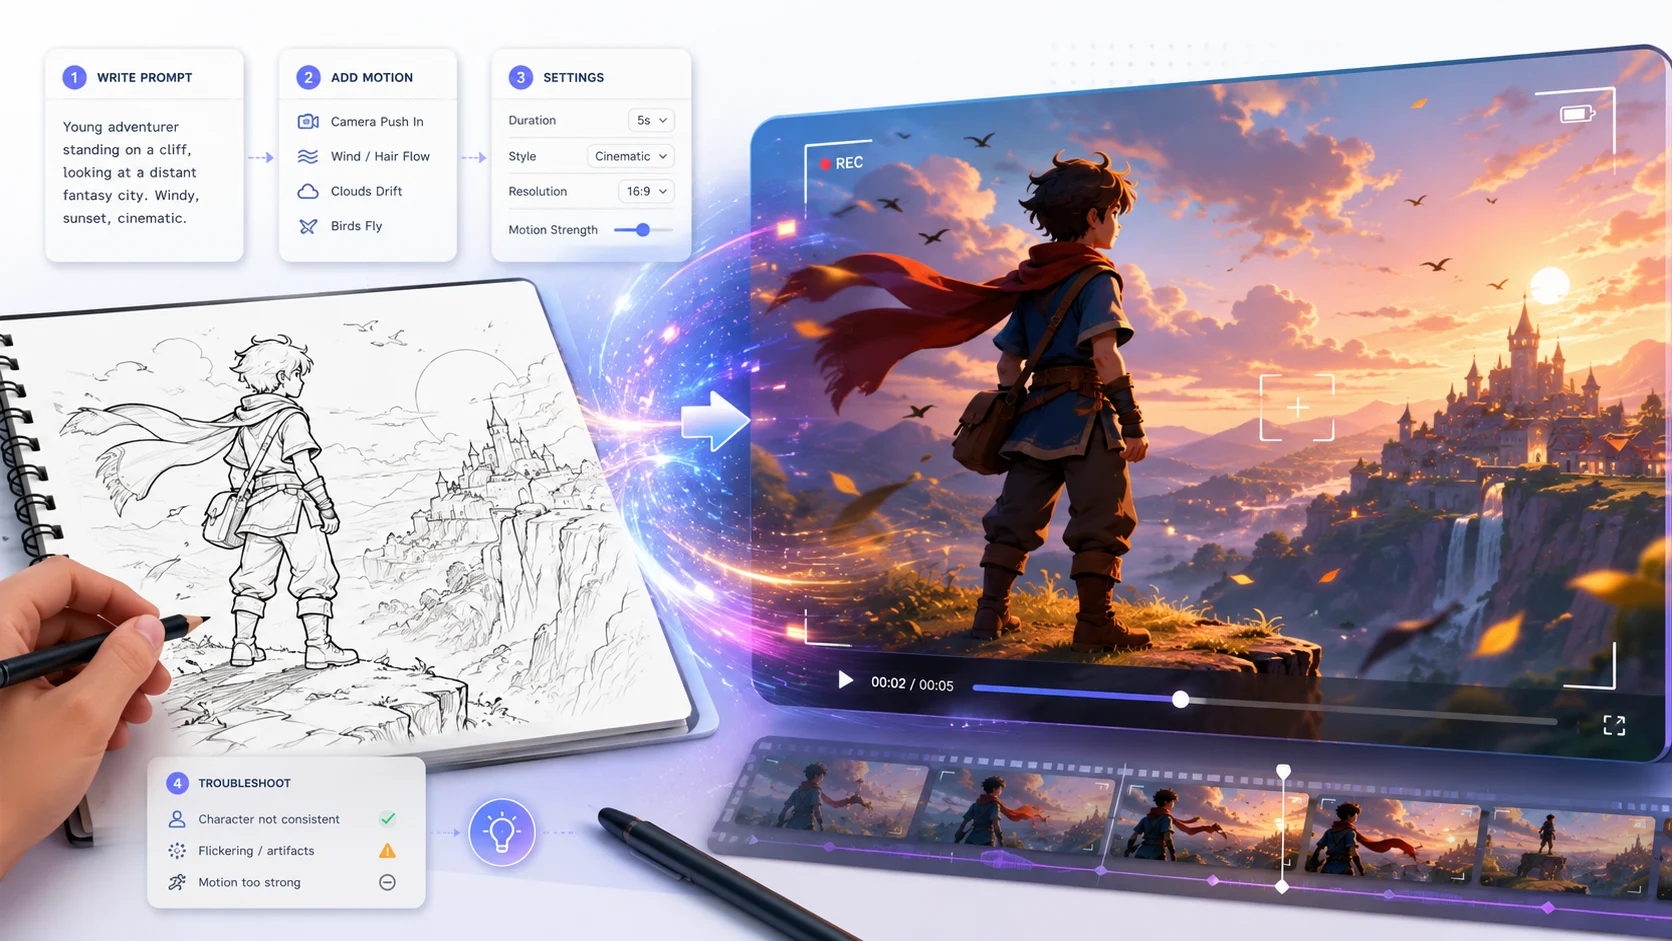
Sketch to video AI converts hand-drawn sketches, doodles, or storyboards into animated video clips using artificial intelligence. Instead of describing a scene in words, you draw the composition you want — giving the AI a spatial anchor that text prompts alone can’t provide.
This guide covers the complete workflow: sketch preparation, prompt writing, generation settings, and troubleshooting the most common problems.
How to Prepare Your Sketch for AI Video Generation
The most overlooked step in sketch to video AI is input preparation. Getting this right is the difference between 15 failed attempts and nailing it in two or three tries.
File Format, Resolution, and Background Setup
Start with the right file format. PNG is the best choice — it preserves clean line edges without compression artifacts. JPG works but can blur fine details. Most tools accept JPG, PNG, and WebP, while SVG support varies.
Aim for at least 1024×1024 pixels. Lower-resolution inputs force the AI to guess at details, and those guesses rarely match your intent.
Use a clean, solid-color background — white or transparent. Paper texture, shadows, or background noise get interpreted as scene elements. If you’re photographing a paper sketch with your phone, ensure even lighting with no shadows. Crop tightly to the subject.
Line Clarity, Contrast, and Composition Rules
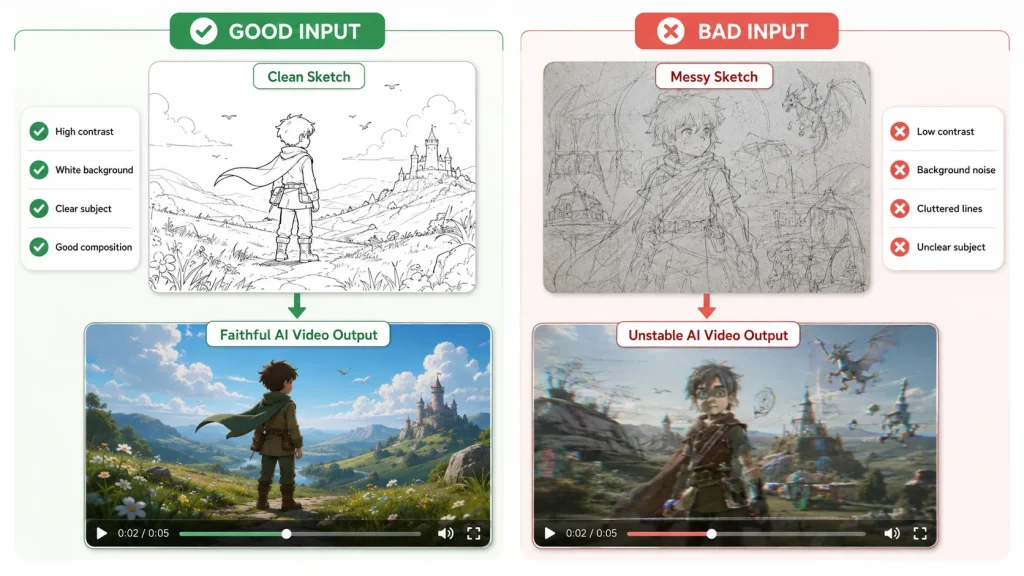
AI treats faint pencil lines as noise. Use dark, confident strokes on a light background for maximum contrast. If your original sketch is light, bump up the contrast in any basic photo editor before uploading.
Keep the main subject centered or clearly dominant in the frame. Avoid cluttered scenes with overlapping elements — the AI struggles to separate objects that blend together. Leave breathing room around characters so the AI has space to add motion.
One critical point: perspective errors in your sketch will be amplified in the video. The AI cannot fix bad foreshortening or inconsistent vanishing points.
In practice, simple sketches with clear outlines produce the most faithful results. You don’t need a photorealistic drawing — you need clean lines and clear spatial intent.
How to Write Prompts That Control Your Sketch to Video AI Output
Here’s what most beginners get wrong: they describe the scene in their prompt. But the sketch already defines the spatial composition. Repeating it in text just confuses the AI — it tries to reconcile two sets of instructions and the result drifts from both.
What to Describe in Your Prompt (and What to Leave Out)
Your prompt should specify what the sketch cannot show: motion direction, animation style, lighting mood, camera movement, and temporal flow. The sketch handles the “what” and “where.” The prompt handles the “how it moves.”
Here’s what actually works:
- Good prompt: “Slow camera zoom in, cinematic lighting, gentle breeze moving the hair, realistic style”
- Good prompt: “Character walks left to right, anime style, warm afternoon light, camera pans to follow”
- Bad prompt: “A girl standing in a field with mountains behind her, she has long hair and is wearing a blue dress” (the sketch already shows this)
Keep prompts short and specific to motion and style. Two focused sentences outperform a paragraph of description every time.
Common Prompt Mistakes That Ruin Your Output
Mistake 1: Restating the sketch layout. Scene descriptions that duplicate the drawing cause the AI to reinterpret your composition. The fix is to focus only on motion, style, and camera.
Mistake 2: Vague motion instructions. “Moving” means nothing. Specify direction and speed — “walking slowly from left to right” or “camera orbits clockwise.”
Mistake 3: Conflicting styles. “Realistic cinematic anime style” sends the AI in three directions at once. Pick one style per generation.
Mistake 4: Over-prompting. Long prompts dilute the sketch’s influence. Start with 15-25 words and add only if needed.
Generation Settings and Motion Control: What to Adjust
Most beginners leave every setting on default and blame the tool when results look wrong. A few targeted adjustments make a big difference.
Duration, Resolution, and Frame Rate
Most tools generate clips between 4 and 15 seconds. Start with 4-5 second clips to test your sketch and prompt before committing credits to longer durations.
For resolution, 1080p is the sweet spot. 720p looks noticeably soft, and 4K increases cost without a proportional quality jump for sketch inputs.
Frame rate offers a creative choice. 24fps gives a cinematic feel. 12fps creates a hand-drawn animation look — the “animated on twos” technique. The lower frame rate also makes minor AI artifacts between frames less noticeable.
Motion Intensity and Camera Movement Presets
Motion intensity controls how much movement the AI adds. Low intensity produces subtle effects like breathing or gentle swaying. High intensity generates dramatic action — but on detailed sketches, it often causes distortion.
The fix is to start low and increase gradually. A static or slow-zoom camera paired with low motion intensity gives you the most controlled output.
Camera movement presets — pan, zoom, orbit, and static — change the feel dramatically. Static works best for close-ups. Slow zoom adds drama without distortion. Pan and orbit suit wider compositions.
Key Takeaway: Low motion intensity with a static camera is the safest starting point. Increase settings only after reviewing your first test clip.
Troubleshooting Common Sketch to Video AI Problems
Even with good preparation, some outputs miss the mark. Here’s how to fix the most frequent problems without wasting credits.
The AI Changed My Sketch Beyond Recognition
The most common cause is a low-contrast sketch on a noisy background. The AI treats faint lines as suggestions, not instructions. The fix is to increase line contrast, switch to a clean white background, and shorten your prompt.
If your prompt contradicts the sketch composition — describing a layout that differs from what you drew — the AI splits the difference and neither version wins. Remove scene-layout descriptions and let the sketch define spatial elements.
Some tools have a creativity or imagination slider. If yours does, lower it to prioritize sketch fidelity over artistic reinterpretation.
Flickering, Artifacts, and Distorted Motion
Flickering between frames usually means motion intensity is too high for the detail level in your sketch. Reduce it by 20-30% and regenerate.
Extra limbs or morphing body parts happen when the sketch has ambiguous anatomy — overlapping arms, unclear joint positions. Redraw those areas with clear separation between limbs.
Text or symbols appearing in the output is a known model limitation across most tools. Avoid including any text in your sketch input. If colors shift randomly between frames, add a fixed color palette to your prompt — something like “consistent warm color palette, no color shifts.”
Frequently Asked Questions About Sketch to Video AI
Do I need drawing skills to use sketch to video AI?
No. Simple stick figures and basic shapes work well — in fact, simple sketches with clear lines often produce more consistent results than complex drawings. The AI interprets spatial composition, not artistic quality.
What’s the best file format for sketch to video AI?
PNG with a white or transparent background at 1024×1024 pixels or higher. JPG works but may introduce compression artifacts around line edges. Most tools accept JPG, PNG, and WebP. Avoid low-resolution phone screenshots.
Why does the AI keep changing details in my original sketch?
The AI treats your sketch as a guide, not a strict template. To maximize fidelity: use high-contrast dark lines on a light background, keep your prompt focused on motion and style rather than scene description, and lower the creativity or imagination setting if your tool offers one.
How long can AI-generated videos from sketches be?
Most tools generate 4 to 15 second clips per generation. For longer videos, generate multiple clips and stitch them together in an editor like CapCut. Some platforms support sequential scene generation to maintain visual consistency across clips.
Conclusion
Sketch to video AI produces dramatically better results when the input is prepared correctly. Your output quality depends more on sketch preparation, prompt discipline, and appropriate settings than on which tool you choose. Start with a high-contrast sketch and a short prompt describing only the motion you want — generate a 4-second test clip and iterate from there. For a hands-on starting point, try uploading a sketch to AI Image to Video and experiment with the settings covered in this guide.