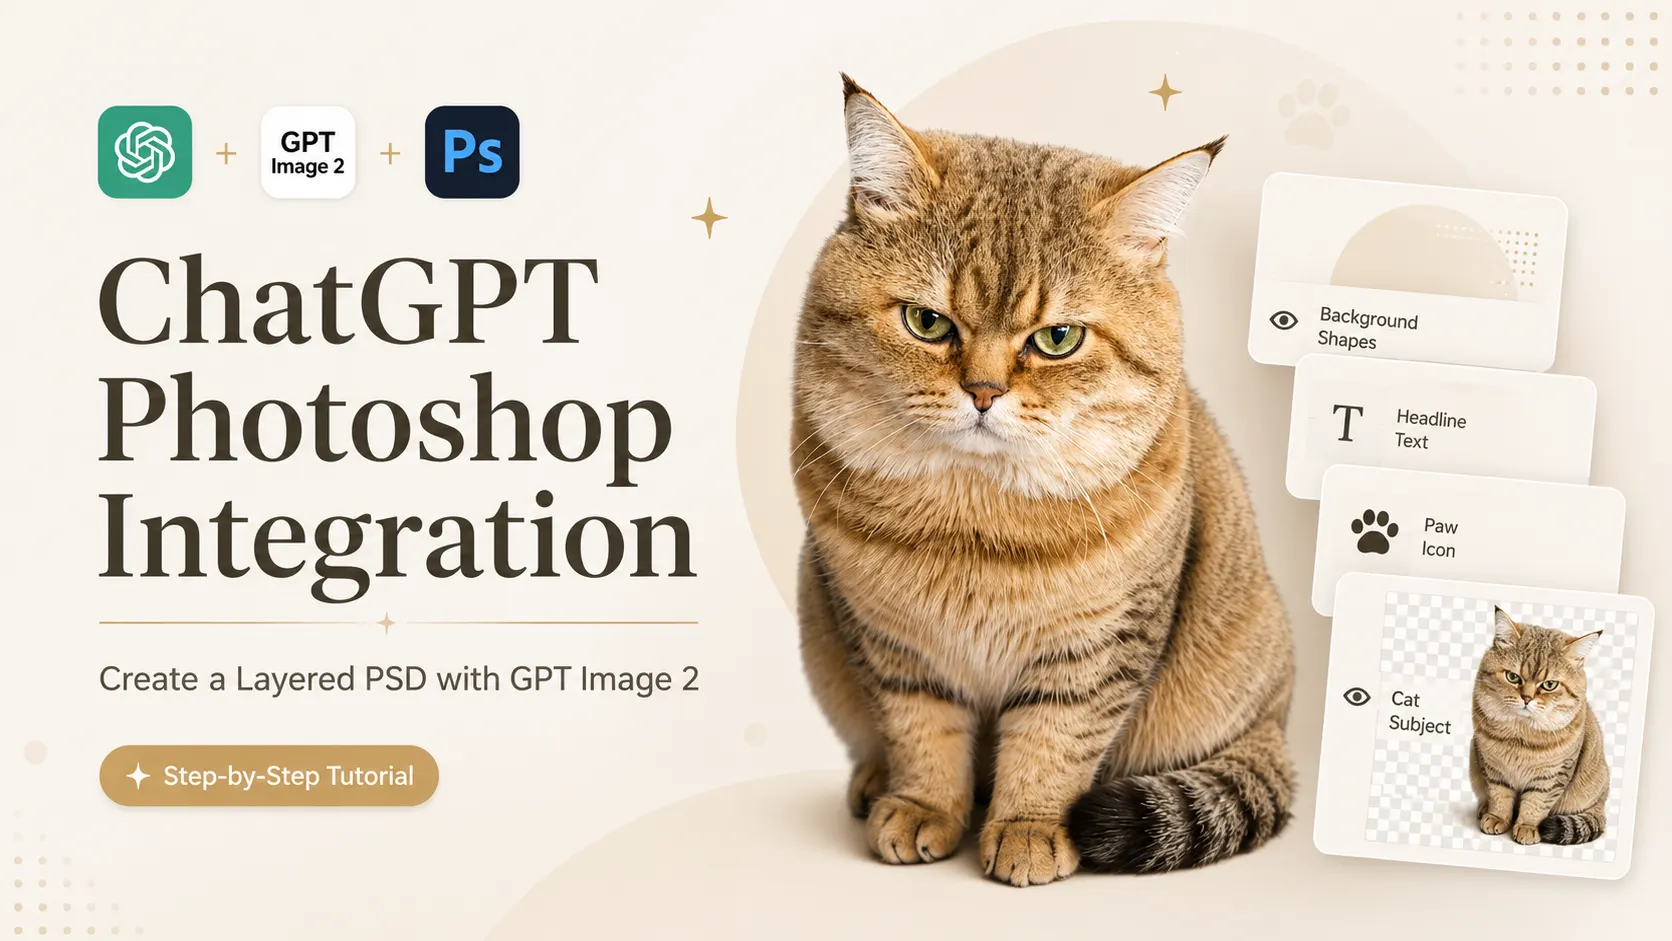
Can ChatGPT create a PSD file? Yes — with the ChatGPT Photoshop integration, you can create a layered PSD from a GPT Image 2 design. Instead of staying stuck with one flat AI-generated image, you can turn the visual into an editable PSD that can be opened, adjusted, and refined in Photoshop.
This tutorial walks you through the process step by step, from creating the first AI design to preparing a Photoshop-ready file. It is especially useful for social media covers, blog images, posters, ecommerce graphics, and quick design drafts.
By the end, you will have a Photoshop project file that gives you a much better starting point than rebuilding an AI-generated image by hand. If you want to turn the finished design into a short motion clip, you can use AI image to video tool after exporting the final image.
Step 1 — Generate or Upload an Image with GPT Image 2
Start with One Complete Image
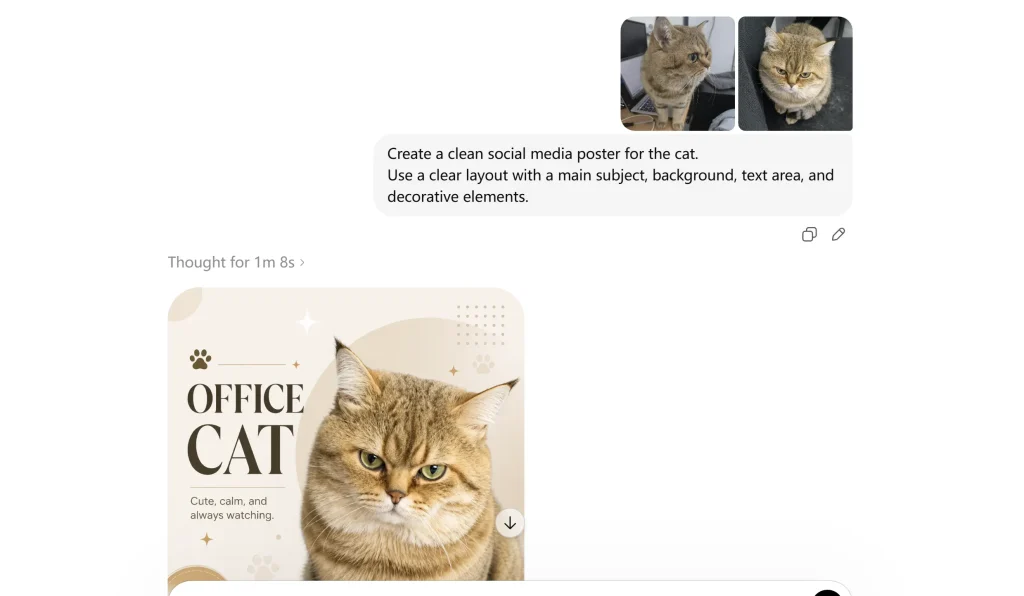
First, prepare the image you want to turn into a layered PSD. You can either generate a new design with GPT Image 2 or upload your own poster, blog cover, product image, or social media graphic.
At this step, do not ask for a PSD yet. Just make sure the image is complete and clear enough for the next layer-splitting step.
You can use a simple prompt like this:
Create a clean social media poster for [your topic].
Use a clear layout with a main subject, background, text area, and decorative elements.
Once the image is ready, move to the next step and use ChatGPT to separate it into Photoshop-ready layers.
Step 2 — Split the Image into Photoshop-Ready Layers in ChatGPT
Use Thinking Mode to Separate the Image
After your image is ready, ask ChatGPT to split it into separate design layers. This is the key step for using ChatGPT to make Photoshop project files.
Turn on Thinking mode if it is available, then use a clear prompt to tell ChatGPT what you need: separate layers, same canvas size, original position, and Photoshop-ready output.
Copy This Layer-Splitting Prompt
Use this prompt:
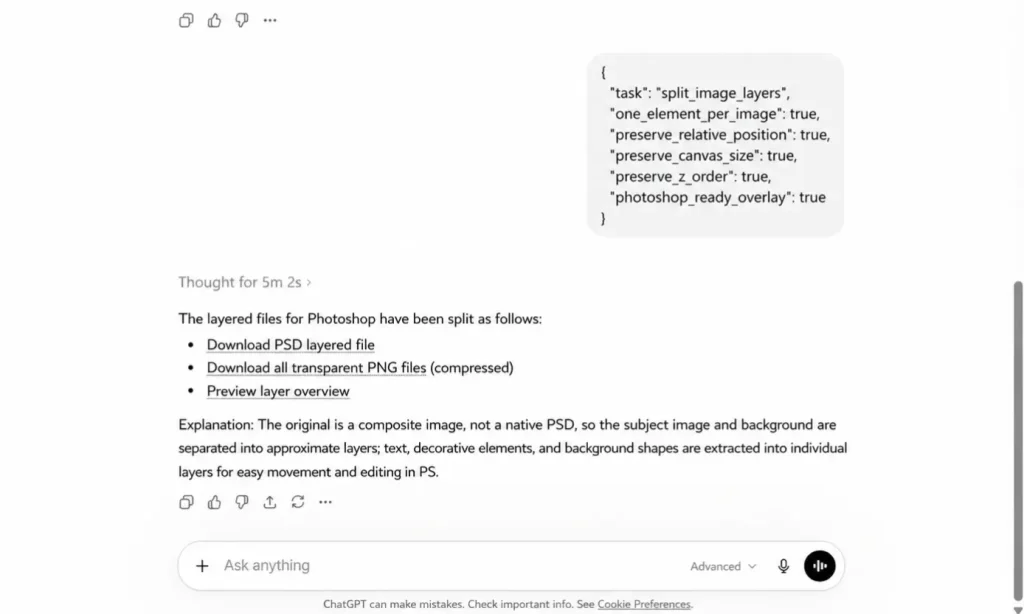
{
  "task": "split_image_layers",
  "one_element_per_image": true,
  "preserve_relative_position": true,
  "preserve_canvas_size": true,
  "preserve_z_order": true,
  "photoshop_ready_overlay": true
}
This prompt tells ChatGPT to create separate layer images while keeping the original layout. That way, the layers can be stacked correctly later in Photoshop.
For a poster, cover, or product image, you can also add:
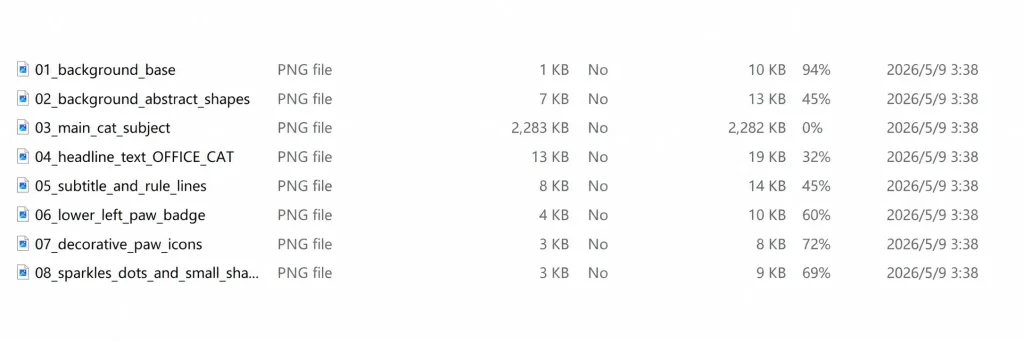
Split the image into major design layers, such as background, main subject, text, decorative elements, and light effects. Do not break the design into tiny fragments.Save the Generated Layer Images
ChatGPT should return several separated image layers. These may include the background, subject, text area, decorative elements, icons, shadows, or foreground details.
Download or keep these layer images ready. In the next step, you will use Photoshop in ChatGPT to combine them into a layered PSD or editable Photoshop project file.
Step 3 — Use Photoshop in ChatGPT to Create the PSD File
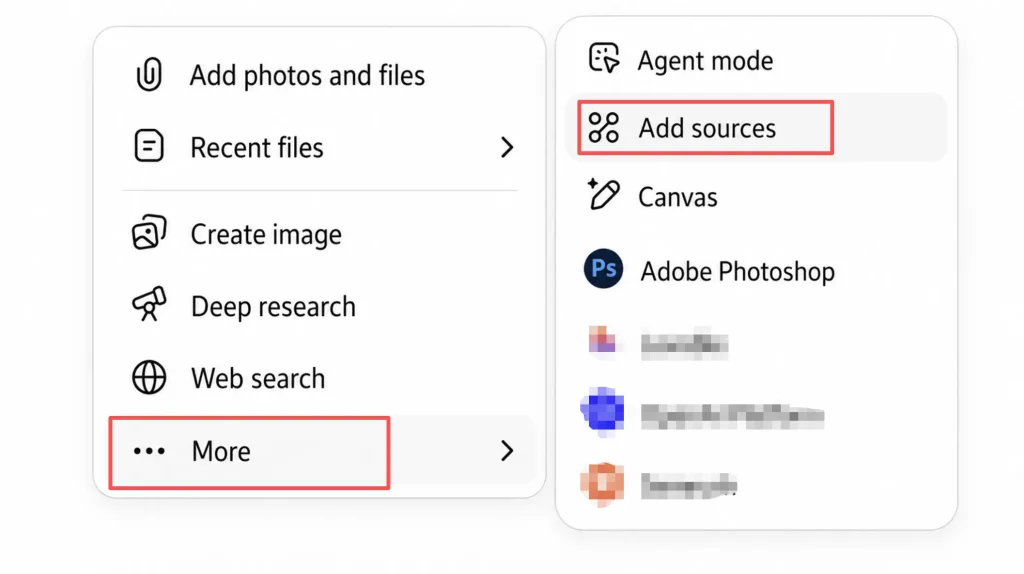
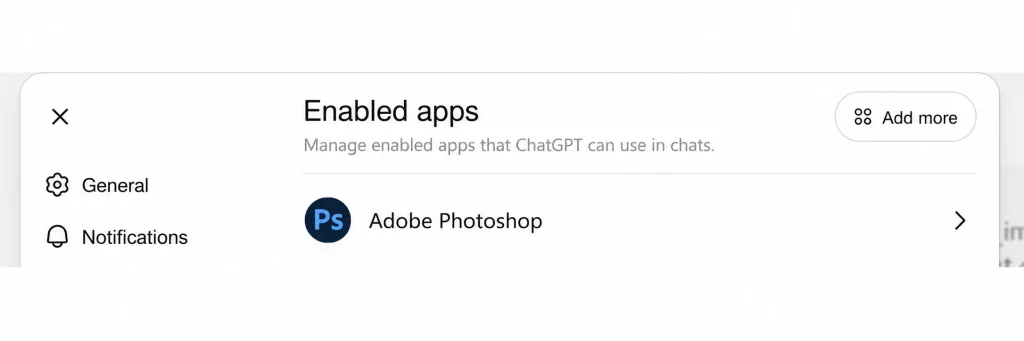
Select Adobe Photoshop in ChatGPT
After ChatGPT creates the separated layers, open the Photoshop in ChatGPT option from the app or source menu. This is where the ChatGPT Photoshop integration turns the separated layer images into an actual PSD file.
Use This Prompt to Combine the Layers
Copy this prompt and send it to Photoshop in ChatGPT:
Use Photoshop to combine these separated layers into one PSD file.
Keep the original canvas size and relative positions.
Preserve the layer order.
Remove the solid white background where needed.
Export the final result as an editable PSD.
This tells Photoshop to stack the layers in the right order and keep the original layout. The result should be an editable PSD or Photoshop project file that you can open and adjust in Photoshop.
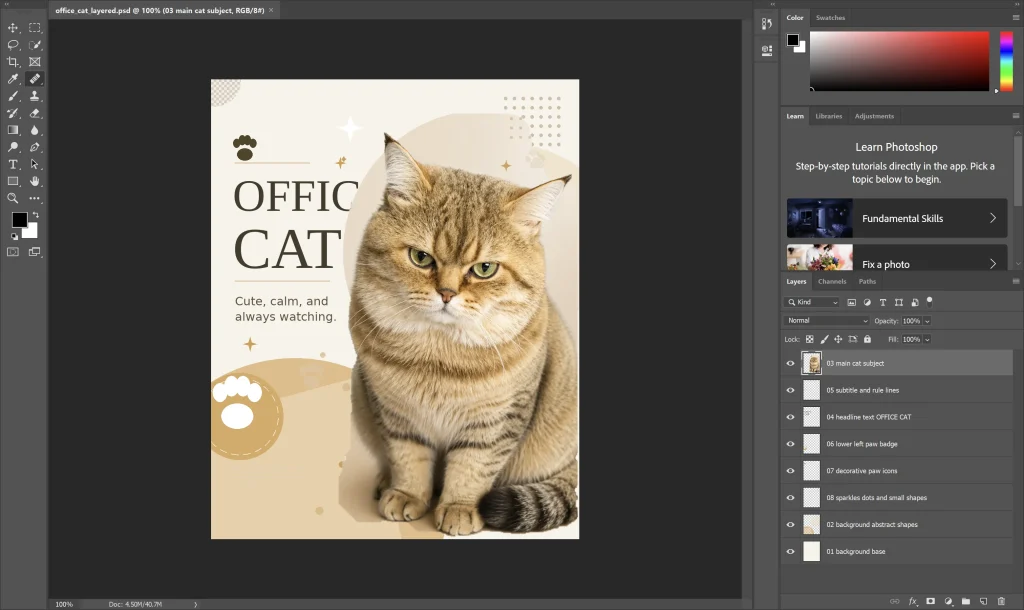
Step 4 — Download and Edit the Layered PSD in Photoshop
Open the PSD in Photoshop
After Photoshop creates the PSD file, download it and open it in Photoshop. Check the layer panel first. You should see separate layers for the main parts of the design, such as the background, subject, text area, decorations, or light effects.
Edit the PSD Layers
Now you can adjust the layered PSD like a normal Photoshop project file. You can move layers, hide elements, delete decorations, replace the background, or reposition the main subject.
In most cases, AI-generated text may still appear as an image layer instead of a real editable text layer. For cleaner typography, retype the text manually in Photoshop.
FAQ About ChatGPT Photoshop and PSD Files
Can ChatGPT Photoshop Images?
Yes, with Photoshop in ChatGPT, you can use prompts to edit images through Adobe Photoshop. This is useful for people searching for can ChatGPT Photoshop images or can ChatGPT Photoshop photos. The important point is that ChatGPT handles the conversation and instructions, while Photoshop performs the image editing task.
Can ChatGPT Export PSD Files Directly?
Not exactly. GPT Image 2 does not natively export a perfect PSD source file by itself. The practical workflow is to generate an image with GPT Image 2, split it into layers in ChatGPT, and then use Photoshop to combine those layers into a PSD file.
So the better way to describe it is:
ChatGPT + GPT Image 2 prepares the design layers.
Photoshop builds the editable PSD file.
Why Are My PSD Layers Misplaced?
Layer misplacement usually happens when the prompt does not tell ChatGPT to preserve the original canvas size and relative position.
Add this to your layer-splitting prompt:
preserve_canvas_size: true
preserve_relative_position: true
This helps each layer stay in the right place when Photoshop stacks everything together.
Why Are My Layers Broken Into Too Many Pieces?
This usually means the prompt was too vague or the design image was too complex. Instead of asking ChatGPT to split every tiny object, ask for major design layers.
Use this instruction:
Split the image into major design layers, not tiny fragments.This creates a more usable Photoshop project file.
Is This Workflow Good Enough for Professional Design Work?
It is good for fast drafts, social media visuals, blog covers, poster concepts, ecommerce images, and marketing graphics. It is not a replacement for final design polish.
Before publishing or delivering the final file, a designer should still check the edges, replace text, clean up masks, organize layers, and refine the composition.
Conclusion
The ChatGPT Photoshop integration is more than a faster way to edit AI images. It shows how AI design workflows are changing. Instead of stopping at a flat generated image, you can now move closer to a real Photoshop project file — with separate layers, editable parts, and room for manual refinement.
GPT Image 2 helps you create the first visual idea. ChatGPT helps separate that idea into usable design layers. Photoshop in ChatGPT turns those layers into a layered PSD that you can keep editing instead of rebuilding from scratch.
For designers, marketers, and creators, this is the real value: not replacing the final creative work, but removing the slow, repetitive setup work. For TikTok creators, the same PSD draft can also become the starting visual for AI TikTok video generator workflow. You still control the final polish, but you start from an editable PSD draft instead of a flat image.