วิธีสร้างวิดีโอ 360° ด้วย AI (คู่มือทีละขั้นตอน)
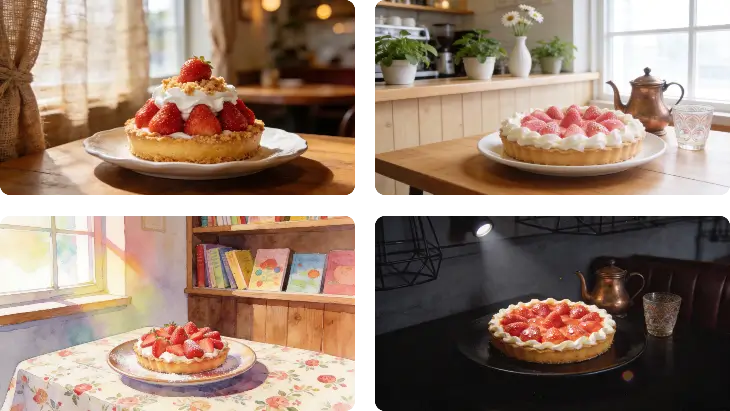
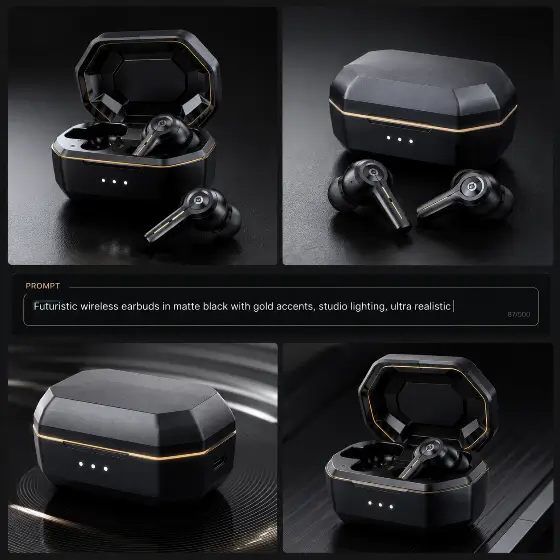
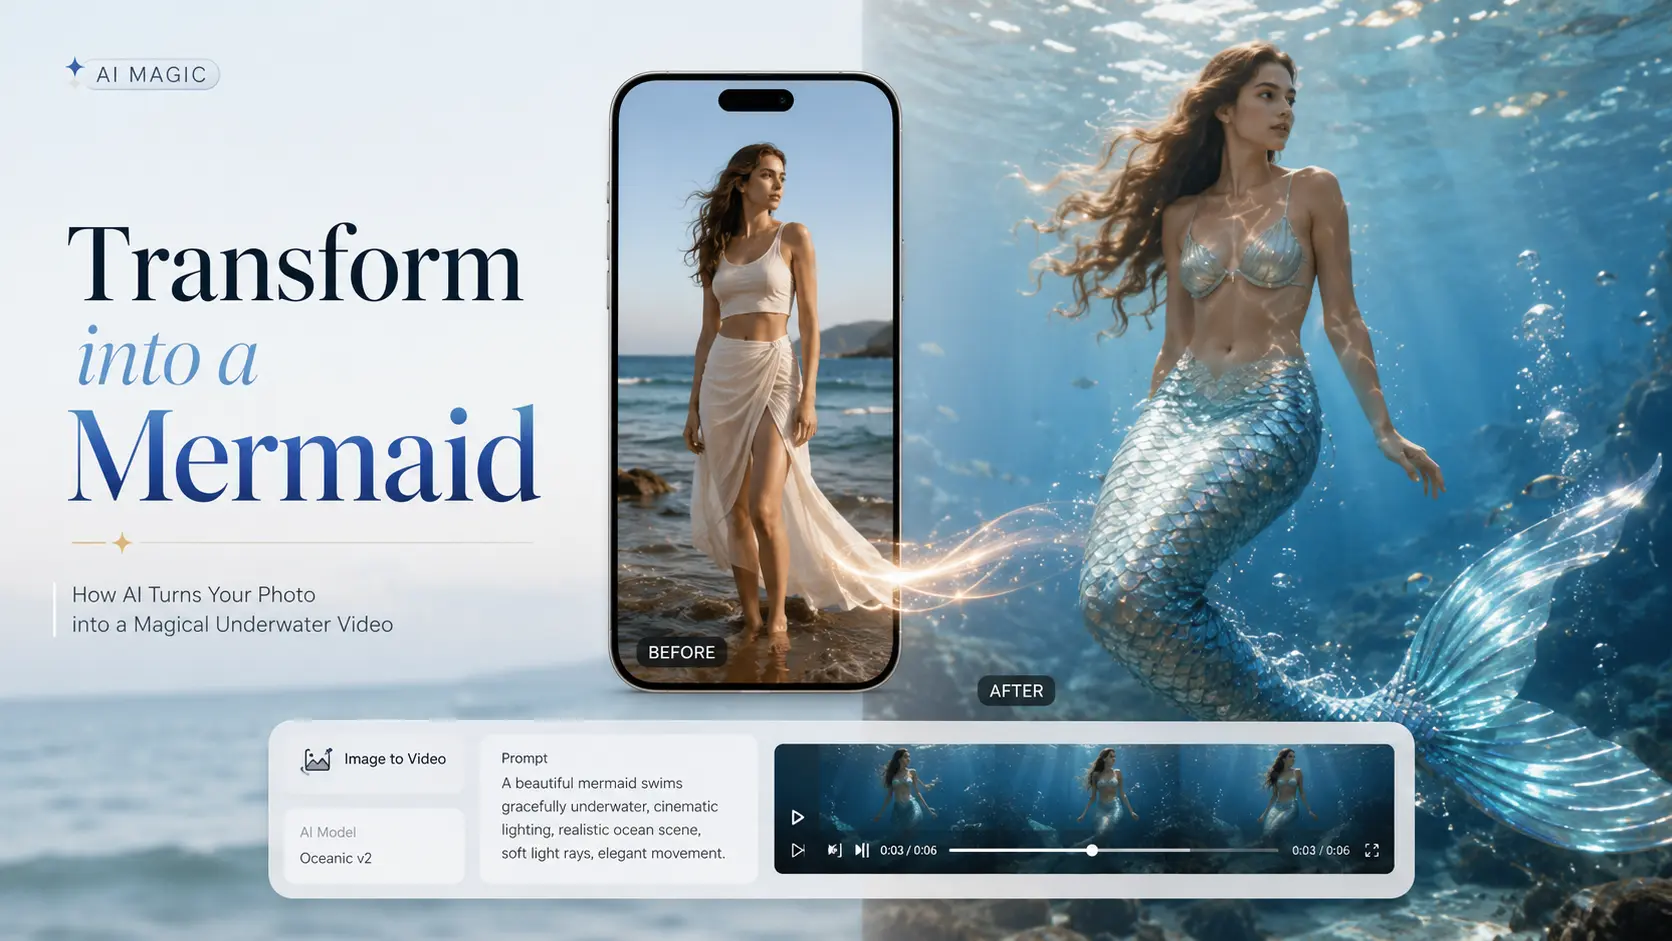
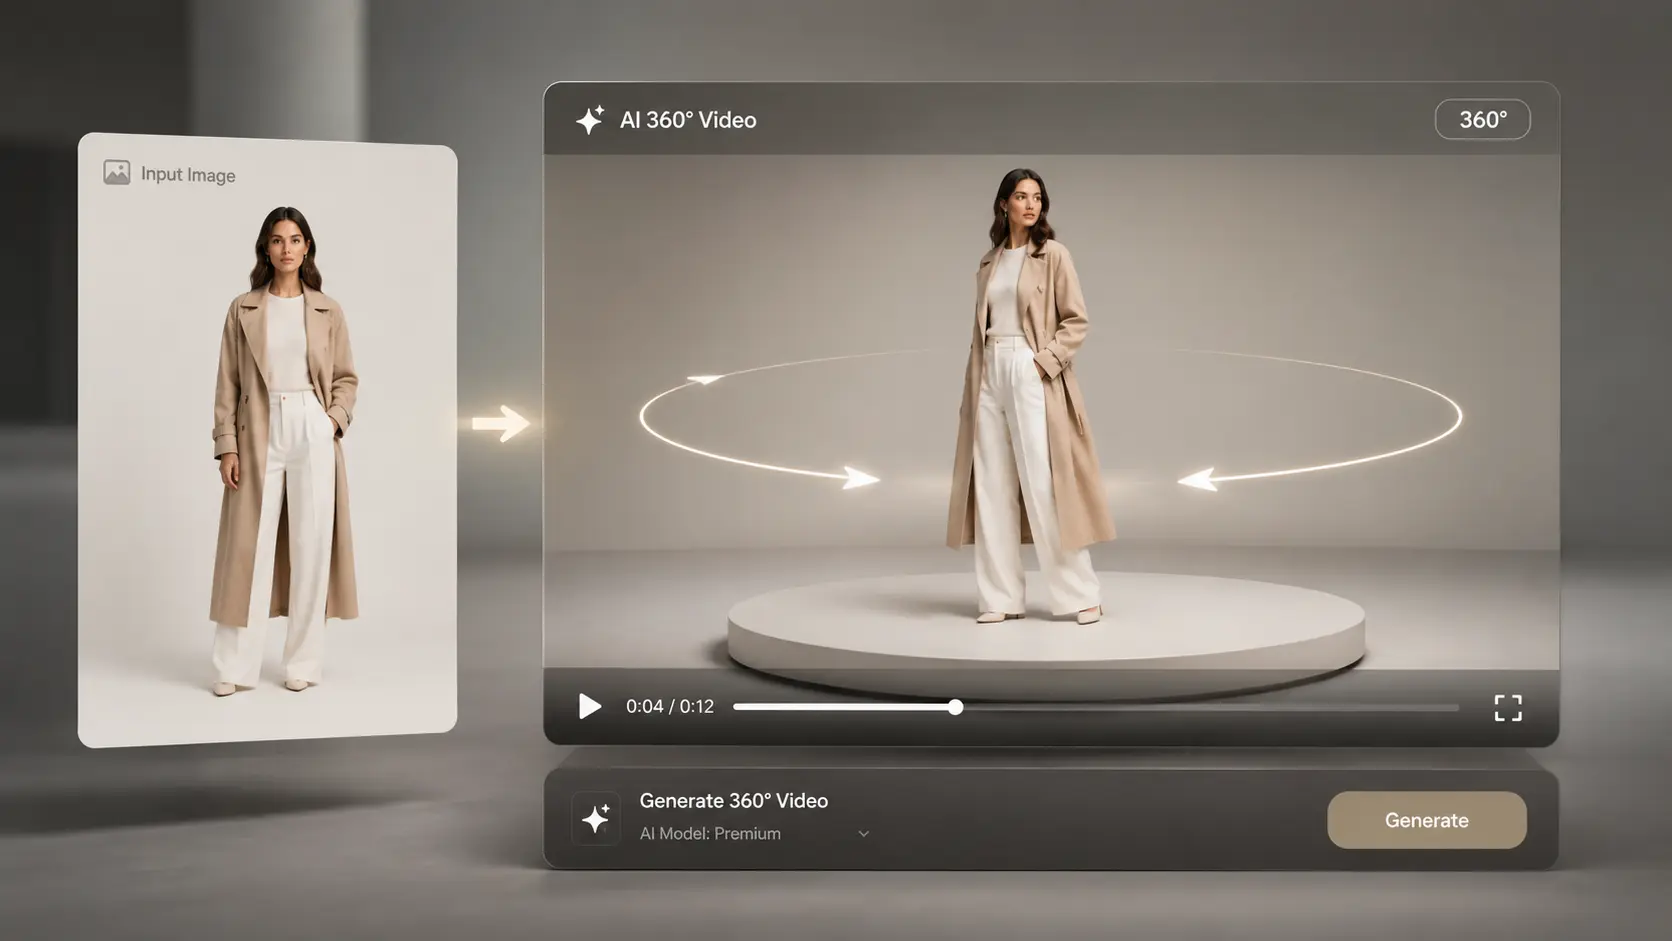
You can turn a single photo — a product, a person, a car, or a model — into a smooth 360° video with AI, with no camera, studio, or editing software. The hard part is that most first tries go sideways: you get a “wobbly photo,” a warped product, a subject that spins about 30° and stops, or a face that melts at the edges. Almost always, that comes down to picking the wrong method or writing a vague prompt. คู่มือนี้จะช่วยแก้ไขปัญหานั้นได้ You’ll learn what an AI 360° video actually is, the exact steps to make one, copy-paste prompts you can drop your own subject into, the subjects that work best, and quick fixes for the errors everyone hits. What Is an AI 360° Video? An AI 360° video is a short video where the subject makes a full turn, or the camera smoothly moves around the subject. It can be generated from a single photo, a product image, or a text prompt. There are two common styles. A spin video means the subject rotates in place while the camera stays still. A camera orbit video means the subject stays still while the camera circles around it. For best results, make the movement clear in your prompt. Use “the subject rotates 360 degrees” for a spin effect, or “the camera orbits around the subject” for an orbit effect. How to Make a 360° Video with AI: Step by Step Five short steps take you from a photo to a finished clip: (1) prepare a clear image or prompt, (2) choose an AI image-to-video tool, (3) write a 360° prompt and set the motion direction, (4) generate, then (5) review and optimize until the turn is smooth. Here’s the full workflow, broken into four practical steps. Step 1 — Prepare your image or text prompt Start with one clear, well-lit photo. The subject should be centered, fully visible, and shot against a clean, simple background — that gives the AI the best chance of keeping it stable through a full turn. If you’re starting from text instead, write a specific description of the subject rather than a vague one. Step 2 — Choose an AI image-to-video tool Look for a tool that supports both image-to-video and text-to-video, gives you control over motion intensity and aspect ratio, and exports clean, high-resolution clips. AI Image to Video is a solid fit here — it converts images or text into video using top models like Kling, Veo, and Wan, outputs up to 4K with no watermark, and lets you dial in motion intensity and video length. That motion control matters a lot for a clean 360° turn. Step 3 — Write your prompt (and set the motion direction) Name the subject, then say what you want: “the camera orbits 360 degrees” or “the subject rotates a full 360°.” Set the direction (clockwise, or left-to-right), and ask for slow, smooth, steady motion with the subject staying centered and still. You’ll find ready-made templates in the next section. Step 4 — Generate, review, and optimize After generating, check three things: the rotation completes a full circle, the subject stays stable, and the background doesn’t drift or duplicate. If something’s off, lower the motion speed, simplify the prompt, or regenerate. Nudging the duration or motion intensity often turns a half-turn into a complete, smooth one. Copy-and-Paste 360° Video Prompt Templates The fastest way to get a good result is to start from a prompt that already works, then swap in your subject. Copy any of these and replace the text in [brackets]. Product spin prompt (e-commerce): Product spin prompt (e-commerce) Use for: a 360-degree product video for a store page. Camera-orbit prompt (people, cars, architecture) Use for: a true camera orbit, not a flat spin. Turntable prompt (characters, clothing, toy models) Use for: image-to-360 video of people, outfits, and models. What Subjects Work Best for AI 360° Videos? AI 360° videos work best on clear, simple subjects: products, cars, clothing, toy models, characters, people, and buildings. Solid backgrounds and visible, well-lit subjects rotate the most smoothly. Some subjects rotate cleanly almost every time; others need extra care. Picking the right one saves you a lot of regenerating. Great subjects: products, cars, clothing, and toy models These have defined shapes, simple surfaces, and clear edges, which lets the AI keep them stable through a full turn. They’re ideal for store pages and short social clips, and they tend to look polished on the first or second try. Trickier subjects: people, characters, and detailed/architecture shots Be realistic here. Faces, fine details (freckles, hair, logos), reflective or transparent objects, and busy backgrounds can warp or drift as the AI invents the unseen side. You can still get good results — just use a clean background and a clear, front-facing photo to give the AI less to guess at. Common 360° Video Problems (and How to Fix Them) Most 360° issues have a one-line fix. The table below covers the five problems people run into most, and each is explained underneath. Problem Quick fix Image distortion or warping Use a sharp photo; simplify the prompt; add “no warping, no distortion” Incomplete rotation State “a full 360°”; raise duration or motion slightly; regenerate Background drift / duplicated scenery Use a plain background; add “consistent background, no new objects” Unstable or shaky subject Lower motion; add “subject stays centered and perfectly still” Camera moving too fast Use “slow, smooth, steady”; reduce motion intensity Image distortion or warping This usually comes from a blurry, low-res source or an over-complicated prompt. Use a sharp, well-lit photo, keep the prompt simple, and add “no warping, no distortion.” Incomplete rotation (only turns partway) If the subject turns part way and stops, the motion is too slow for the clip length or the prompt is vague. State “a full 360°,” bump up the duration or motion a little, and regenerate. Background drift or duplicated scenery When the AI can’t see the far side, it sometimes invents or copies scenery. A plain, solid background fixes most of this — add “consistent background, no new objects” to reinforce it. ไม่แน่นอน


AI ที่ดีที่สุดสำหรับการสร้างภาพ
ฉันได้ลองใช้โปรแกรมสร้างภาพ Krea AI และโปรแกรมสร้างภาพ Grok AI แล้ว แต่นี่เป็น AI ที่ดีที่สุดสำหรับการสร้างภาพอย่างแท้จริง รุ่นที่ไม่จำกัดและการขาดอุปสรรคในการลงทะเบียนทำให้สิ่งนี้เป็นตัวขับเคลื่อนคอนเซปต์อาร์ตในแต่ละวันของฉัน
ผลลัพธ์ภาพที่สมจริงของ AI ที่น่าทึ่ง
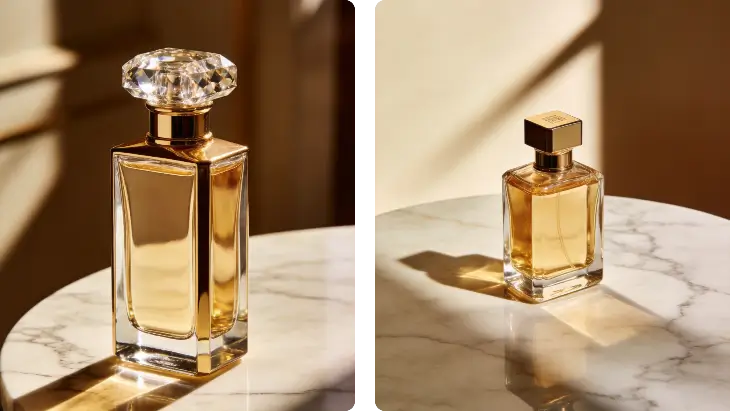
คุณภาพของภาพที่สมจริงของ AI นั้นน่าทึ่งมาก ฉันใช้มันเพื่อสร้างแบบจำลองผลิตภัณฑ์ และแสงก็ดูเป็นธรรมชาติโดยสมบูรณ์ มันเอาชนะเครื่องกำเนิดภาพ AKOOL AI เพื่อความสมจริงของภาพถ่ายได้อย่างง่ายดาย
เหมาะสำหรับการแก้ไขปัญหาการสร้างภาพ AI
ฉันกำลังดิ้นรนกับวิศวกรรมที่รวดเร็ว แต่เคล็ดลับการแก้ไขปัญหาการสร้างอิมเมจ AI ในตัวช่วยให้ฉันปรับแต่งอินพุตของฉันได้ ตอนนี้ผมสามารถสร้างภาพด้วย AI ได้อย่างสมบูรณ์แบบทุกครั้ง
รักเครดิตฟรีทุกวัน
การได้รับเครดิตฟรีทุกวันหมายความว่าฉันสามารถทดลองได้โดยไม่ต้องกังวลเรื่องค่าใช้จ่าย ไม่เหมือนกับแพลตฟอร์มอื่น ๆ เครื่องสร้างภาพ AI แบบไม่จำกัดนี้ทำตามสัญญาได้จริง
ดีกว่าเครื่องสร้างภาพ AI ในพื้นที่
การตั้งค่าเครื่องสร้างภาพ AI ในพื้นที่ถือเป็นฝันร้ายสำหรับฮาร์ดแวร์ของฉัน ตัวเลือกบนคลาวด์นี้ทำงานได้อย่างไร้ที่ติและสร้างการออกแบบตัวละครภาพ AI ที่น่าทึ่งโดยไม่ต้องใช้ GPU ของฉัน
ภาพ AI ที่สมบูรณ์แบบสำหรับเครื่องสร้างภาพ
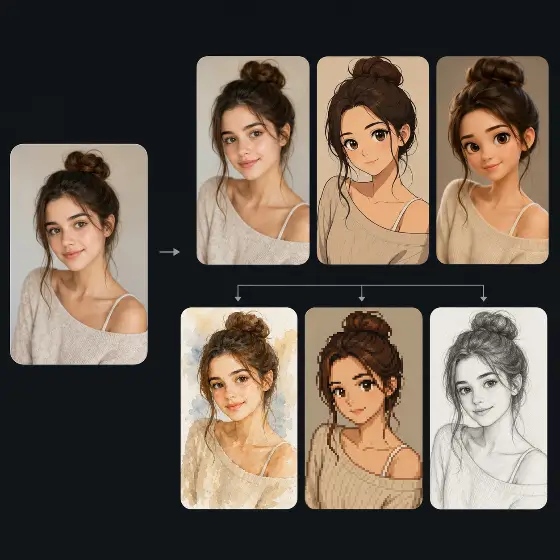
คุณสมบัติ AI image to image Generator นั้นยอดเยี่ยมมากสำหรับการวนซ้ำบนภาพร่างคร่าวๆ ฉันอัปโหลดดูเดิลของฉัน และ AI ก็เปลี่ยนให้เป็นงานศิลปะที่สวยงาม มันเป็นเครื่องมือสำคัญสำหรับเวิร์กโฟลว์ภาพประกอบดิจิทัลของฉัน
AI ที่ดีที่สุดสำหรับการสร้างภาพ
ฉันได้ลองใช้โปรแกรมสร้างภาพ Krea AI และโปรแกรมสร้างภาพ Grok AI แล้ว แต่นี่เป็น AI ที่ดีที่สุดสำหรับการสร้างภาพอย่างแท้จริง รุ่นที่ไม่จำกัดและการขาดอุปสรรคในการลงทะเบียนทำให้สิ่งนี้เป็นตัวขับเคลื่อนคอนเซปต์อาร์ตในแต่ละวันของฉัน
ผลลัพธ์ภาพที่สมจริงของ AI ที่น่าทึ่ง
คุณภาพของภาพที่สมจริงของ AI นั้นน่าทึ่งมาก ฉันใช้มันเพื่อสร้างแบบจำลองผลิตภัณฑ์ และแสงก็ดูเป็นธรรมชาติโดยสมบูรณ์ มันเอาชนะเครื่องกำเนิดภาพ AKOOL AI เพื่อความสมจริงของภาพถ่ายได้อย่างง่ายดาย
เหมาะสำหรับการแก้ไขปัญหาการสร้างภาพ AI
ฉันกำลังดิ้นรนกับวิศวกรรมที่รวดเร็ว แต่เคล็ดลับการแก้ไขปัญหาการสร้างอิมเมจ AI ในตัวช่วยให้ฉันปรับแต่งอินพุตของฉันได้ ตอนนี้ผมสามารถสร้างภาพด้วย AI ได้อย่างสมบูรณ์แบบทุกครั้ง
รักเครดิตฟรีทุกวัน
การได้รับเครดิตฟรีทุกวันหมายความว่าฉันสามารถทดลองได้โดยไม่ต้องกังวลเรื่องค่าใช้จ่าย ไม่เหมือนกับแพลตฟอร์มอื่น ๆ เครื่องสร้างภาพ AI แบบไม่จำกัดนี้ทำตามสัญญาได้จริง
ดีกว่าเครื่องสร้างภาพ AI ในพื้นที่
การตั้งค่าเครื่องสร้างภาพ AI ในพื้นที่ถือเป็นฝันร้ายสำหรับฮาร์ดแวร์ของฉัน ตัวเลือกบนคลาวด์นี้ทำงานได้อย่างไร้ที่ติและสร้างการออกแบบตัวละครภาพ AI ที่น่าทึ่งโดยไม่ต้องใช้ GPU ของฉัน
ภาพ AI ที่สมบูรณ์แบบสำหรับเครื่องสร้างภาพ
คุณสมบัติ AI image to image Generator นั้นยอดเยี่ยมมากสำหรับการวนซ้ำบนภาพร่างคร่าวๆ ฉันอัปโหลดดูเดิลของฉัน และ AI ก็เปลี่ยนให้เป็นงานศิลปะที่สวยงาม มันเป็นเครื่องมือสำคัญสำหรับเวิร์กโฟลว์ภาพประกอบดิจิทัลของฉัน