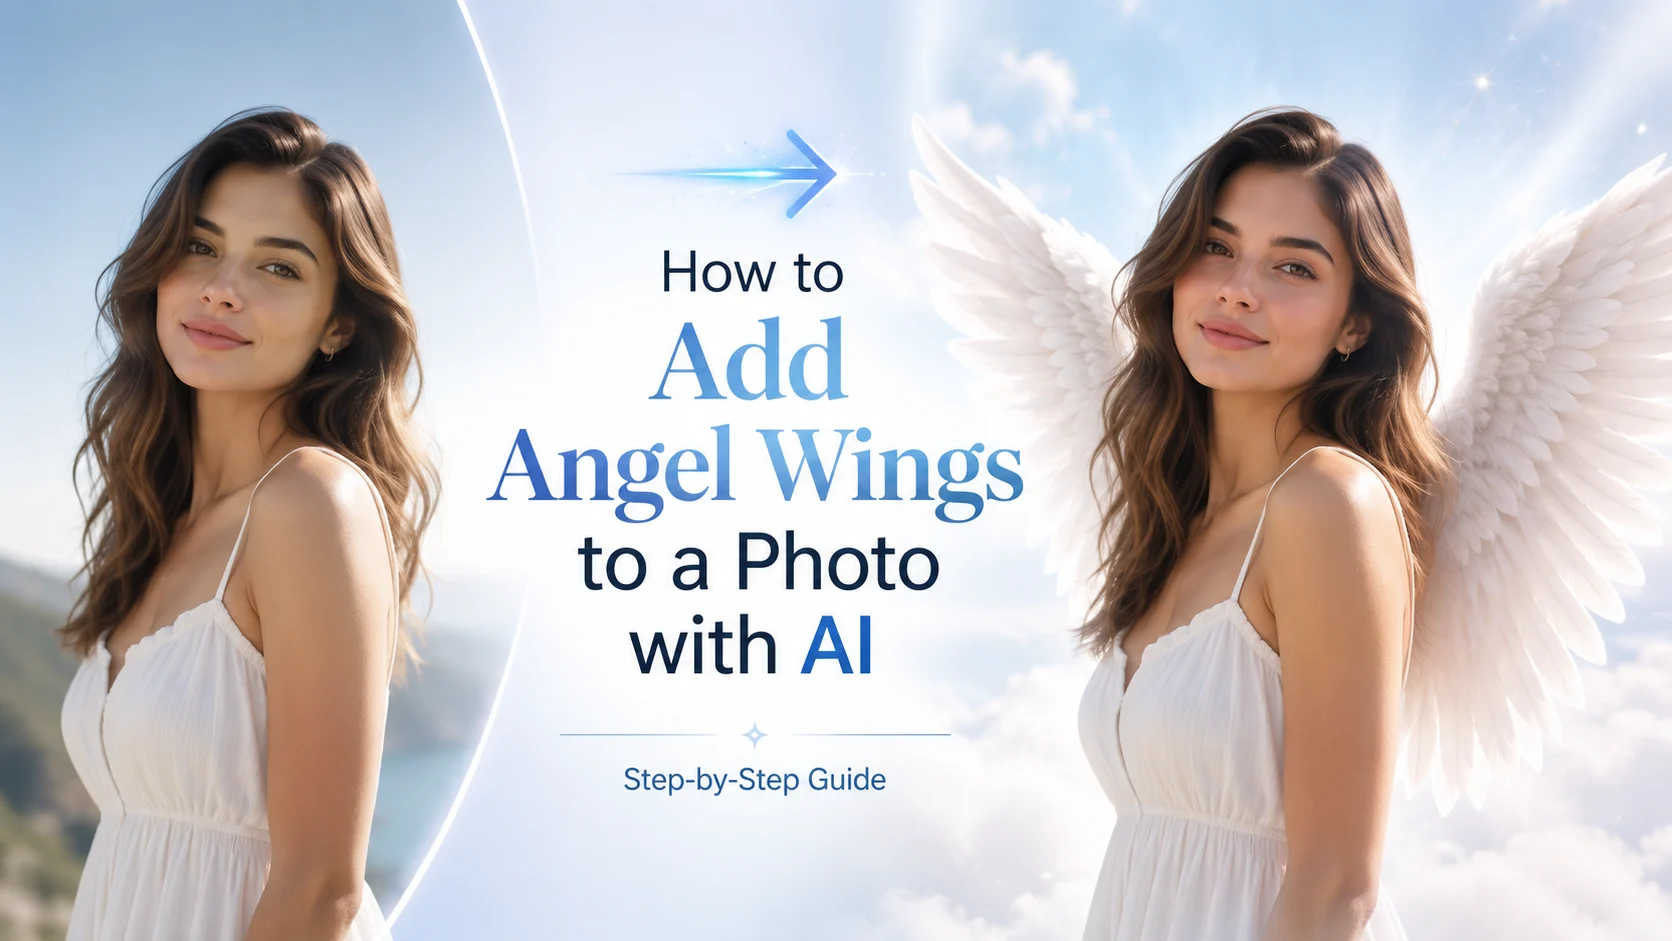
If you’ve tried adding angel wings with an AI app and it kept missing a wing — or changing the face entirely — you’re not alone. Angel-wing edits are everywhere on TikTok, Instagram, and Pinterest right now, from dreamy portraits to heartfelt tributes for pets and loved ones.
The problem is that most tutorials only show one tool, and AI editors are famous for adding a third wing or reshaping someone’s face. It gets frustrating fast, especially when the photo matters.
This beginner-friendly guide fixes that. You’ll learn the exact AI workflow — choosing a photo, adding wings, writing prompts that actually work, and fixing the common mistakes — so your final image looks natural and share-ready. No design skills required.
How to Add Angel Wings to a Photo with AI (Step-by-Step)
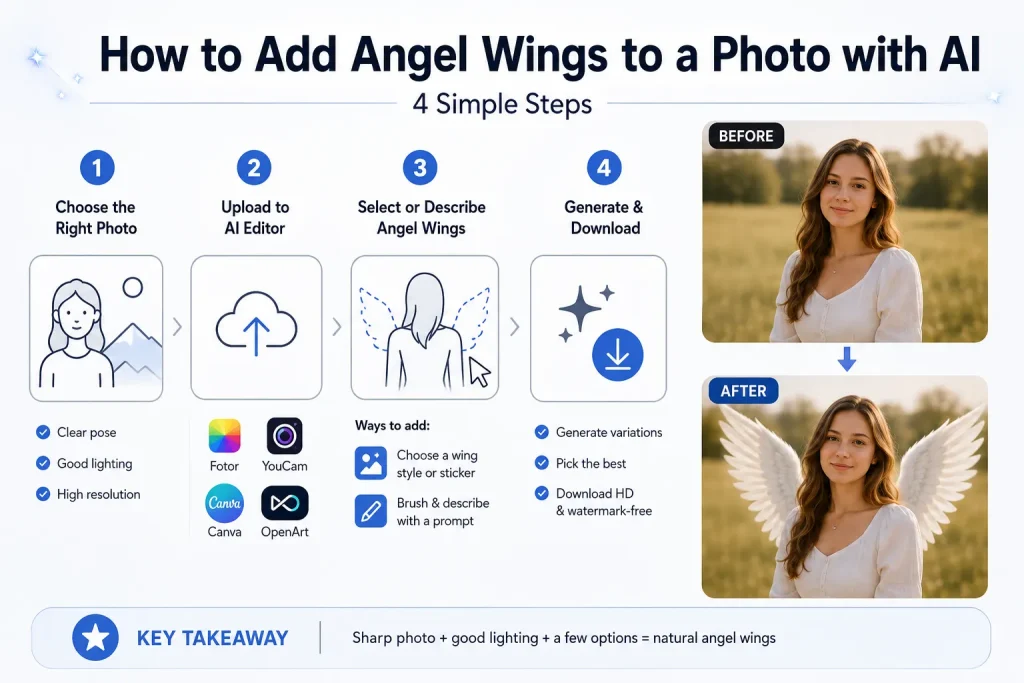
Adding wings with AI comes down to four simple steps. A total beginner can go from a plain photo to a finished, winged image in just a few minutes.
Step 1 — Choose the Right Source Photo
The photo you start with matters more than the tool you use. AI works best when it has clear space to place the wings and a sharp subject to preserve.
Look for these qualities:
- A front- or back-facing pose with open space behind the shoulders or back
- Good, even lighting so the wings can match the scene
- The highest resolution you have — avoid screenshots, which lose detail
For pet or memorial photos especially, pick a clear, well-lit original. A crisp source is the single biggest factor in a believable result.
Step 2 — Upload Your Photo to an AI Editor
Next, open a free AI photo editor. Most tools — like Fotor, YouCam, Canva, or OpenArt — run right in your browser or as a phone app, so there’s nothing to install.
Create a free account if prompted, then upload your image. No editing experience is needed to get started.
Step 3 — Select or Describe the Angel Wings
There are two ways to add wings, and beginners can use either:
- Pick a wing style or sticker from the tool’s library and drag it into place. This is fast and casual.
- Brush the area behind your subject and describe the wings with a prompt. This is a short text instruction telling the AI what to create. It gives more natural, realistic results.
Whichever you choose, position the wings behind the shoulders so they look attached to the body rather than floating.
Step 4 — Generate and Download Your Image
Generate a few variations instead of settling for the first. Compare them side by side and pick the one where the wings look most natural.
Then download a high-resolution, watermark-free version. That gives you a file clean enough to print or post.
Key Takeaway: A sharp source photo plus a few generated options is the fastest path to wings that don’t look pasted on.
Angel Wings Prompts That Actually Work (Copy & Paste)
A good prompt is what separates realistic wings from AI disasters. The right wording keeps the face the same and stops the tool from inventing extra limbs.
The Simple Prompt Formula
Reuse this plug-and-play structure every time:
[keep the subject exactly the same] + [wing type] + [placement behind the shoulders] + [matching lighting] + [natural, realistic blending]
Each part has a job: locking the likeness, choosing the look, anchoring the wings to the body, matching the light, and blending it all smoothly.
Copy-Paste Prompts by Style
Paste one of these into your AI editor and adjust as needed:
- Soft white feathered wings: “Keep the person exactly the same. Add large, soft white feathered angel wings behind the shoulders, matching the photo’s lighting, realistic and naturally blended.”
- Celestial wings with a halo: “Keep the subject unchanged. Add glowing celestial angel wings and a soft golden halo above the head, warm light, seamless realistic blend.”
- Dark/fallen wings: “Keep the subject the same. Add large dark fallen-angel wings behind the back, dramatic shadows, cinematic and realistic.”
- Delicate fairy wings: “Keep the subject exactly the same. Add small translucent fairy wings behind the shoulders, gentle shimmer, natural lighting.”
Negative Prompts to Avoid Extra Wings & Distortion
A negative prompt tells the AI what to leave out. Add this to ban the exact failures beginners hit:
duplicate wings, extra wings, extra limbs, distorted anatomy, changed face, altered likeness, blurry feathers, deformed hands
How to Fix Angel Wings That Look Wrong
Even with a solid prompt, the first result isn’t always perfect. These quick fixes turn a good-enough image into a natural one — no need to give up or pay someone.
Problem — A Missing or Extra Wing
AI often drops one wing or adds a spare. If that happens, regenerate the image and ask specifically for “two symmetrical angel wings.” Brushing the exact area on both sides and keeping the negative prompt in place usually solves it within a try or two.
Problem — The Face or Pet Looks Different
Changed likeness is the most common complaint, and it happens when the AI redraws too much. To preserve the face:
- Mask only the area behind the subject so the tool leaves the person or pet alone
- Lower the edit or change strength if your tool offers that slider
- Add “keep the face and body exactly the same” to your prompt
Problem — The Wings Look Pasted-On
If the wings feel flat or stuck on, run through this realism checklist:
- Match the wing angle to the subject’s pose and body direction
- Match the lighting direction so shadows fall the same way
- Soften and feather the edges where the wings meet the body
- Lower the opacity slightly and add a subtle glow or shadow
That “less is more” touch is what creates a believable, dream-like blend.
Angel Wings for Portraits, Pets & Memorial Photos
The same workflow adapts to almost any goal. Here’s how to tune it for the most popular ones.
Portraits & Creative Social Photos
For a striking look, go bold with fantasy, glowing, or golden wings. Frame the shot vertically (9:16) so it fits Instagram, TikTok, and Pinterest feeds without awkward cropping.
Pet Photos
Match the wing color and softness to your pet’s fur for a natural fit — soft white for light coats, warmer tones for darker ones. Place the wings to suit a four-legged pose so they sit on the body instead of hovering.
Memorial & Tribute Photos
For a lost pet or loved one, gentle and subtle wins. Keep the wings soft and low-opacity, and use a halo-only option when the pose makes full wings hard to place.
Clean up any distracting background, and export at print quality so the image holds up when framed or shown at a service. The goal is a quiet, respectful keepsake — not a flashy effect.
Turn Your Angel Wings Photo Into a Video
Once your image is ready, you can take it one step further. An AI image-to-video tool like AI Image to Video can gently animate the wings into a short, moving clip — perfect for Reels, TikTok, or Shorts, and exported in high definition without a watermark.
FAQs of Adding Angel Wings to a Photo
Can I add angel wings to a photo for free?
Yes. Many web and app-based AI editors let you add wings for free. Some limit the resolution or add a watermark until you upgrade, but the basic edit itself is usually free to try.
What’s the best app to add angel wings to a photo?
It depends on your goal. Use AI prompt tools (like OpenArt or YouCam AI) for the most realistic results, and sticker or overlay apps (like Fotor) for quick, casual edits. Pick by your goal and device.
How do I add angel wings and a halo together?
Add both in a single prompt, such as “angel wings and a soft glowing halo.” Requesting them together keeps the lighting consistent across the whole effect instead of clashing.
Why does AI keep changing the face or missing a wing?
Because it regenerates too much of the image at once. Mask only the background behind your subject, lower the change strength, and add a negative prompt banning “changed face” and “extra wings.”
Can I add angel wings to a photo of my pet?
Yes. Start with a clear, sharp photo and match the wing color to your pet’s fur. Placing the wings to fit the pose keeps the result looking natural rather than pasted on.
Can I turn my angel wings photo into a video?
Yes. An AI image-to-video tool can animate the wings into a short, share-ready clip — great for social platforms and easy to export in high definition.
Conclusion
Adding angel wings to a photo is simple once you know the workflow: choose a good photo, add wings by prompt or sticker, use the copy-paste prompts, fix the common issues, and match the style to your goal — whether that’s a creative portrait, a pet, a memorial, or a social post.
The trick is starting sharp, keeping edits masked to the background, and going subtle for a natural look. Try the free AI method now — then bring your finished image to life by animating the wings into a high-definition, watermark-free clip with AI Image to Video for Reels, TikTok, and Shorts.