Most beginners type a prompt, hit generate, and hope for the best. Ten iterations later, they have burned through credits and still don’t have an image that will animate cleanly.
The problem is not the tool — it is the approach. AI image-to-video involves multiple stages, each requiring a different kind of prompt. A prompt that works for a standalone image can fall apart the moment a video model tries to animate it — edges flicker, backgrounds shift, lighting drifts between frames.
This guide identifies the three decision points where your prompts determine the outcome and shows you what to write at each stage to stop wasting tokens.
Why Image-to-Video Starts With Better Image Prompts
Every flaw in your source image — inconsistent lighting, cluttered backgrounds, ambiguous composition — gets amplified across dozens of animated frames.
The Hidden Cost of Trial-and-Error Prompting
Most beginners waste 10 or more iterations per image because they don’t understand what each generation stage requires. Every regeneration burns API credits, eats into rate limits, and costs time.
The fix is not writing better prompts in the abstract. It is understanding the pipeline so you write the right kind of prompt at the right stage. A structured workflow gets you closer to the result on the first attempt.
How AI Image-to-Video Pipelines Work (A Quick Overview)
Think of image-to-video as a pipeline with distinct stages: concept → image assets → video generation. Each stage has different prompt requirements.
What works for a standalone image often fails when animated. Video-ready images need cleaner edges, more stable compositions, and more consistent lighting than images meant only for viewing. This pipeline has three decision points where you must write a prompt — and each one uses a different vocabulary.
The AI Image-to-Video Workflow: 3 Decision Points Where Prompts Matter
This is the core framework. Before diving in, here is the map: Decision Point 1 defines your creative vision. Decision Point 2 builds all your image assets — from storyboards to final frames. Decision Point 3 tells the video model how to animate.
Decision Point 1 — Storyboard Script Prompt: Turning Your Story Into a Director’s Blueprint
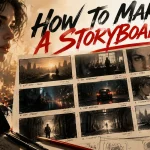
Before generating any images, you need a professional storyboard script — a scene-by-scene breakdown that specifies shot types, camera angles, subject placement, lighting direction, and mood for every frame. This is the document that tells you exactly what to prompt in Decision Point 2.
The problem: most beginners do not have professional directing experience. They know the story they want to tell but cannot translate it into the shot-by-shot language that image and video generators require. This is where AI earns its keep — not as an image generator, but as a screenwriting assistant.
Prompt a text AI with your full script or story idea and ask it to produce a structured storyboard script. The prompt you write here is not for image generation. It is for converting your narrative into professional directing language so that every downstream step has clear, actionable instructions.
Decision Point 2 — Image Generation Prompt: Building Video-Ready Image Assets
This is the most complex decision point and where most of your prompting effort goes. Image generation for video is not a single prompt — it involves generating multiple distinct asset types, each with its own priorities.
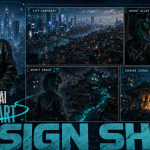
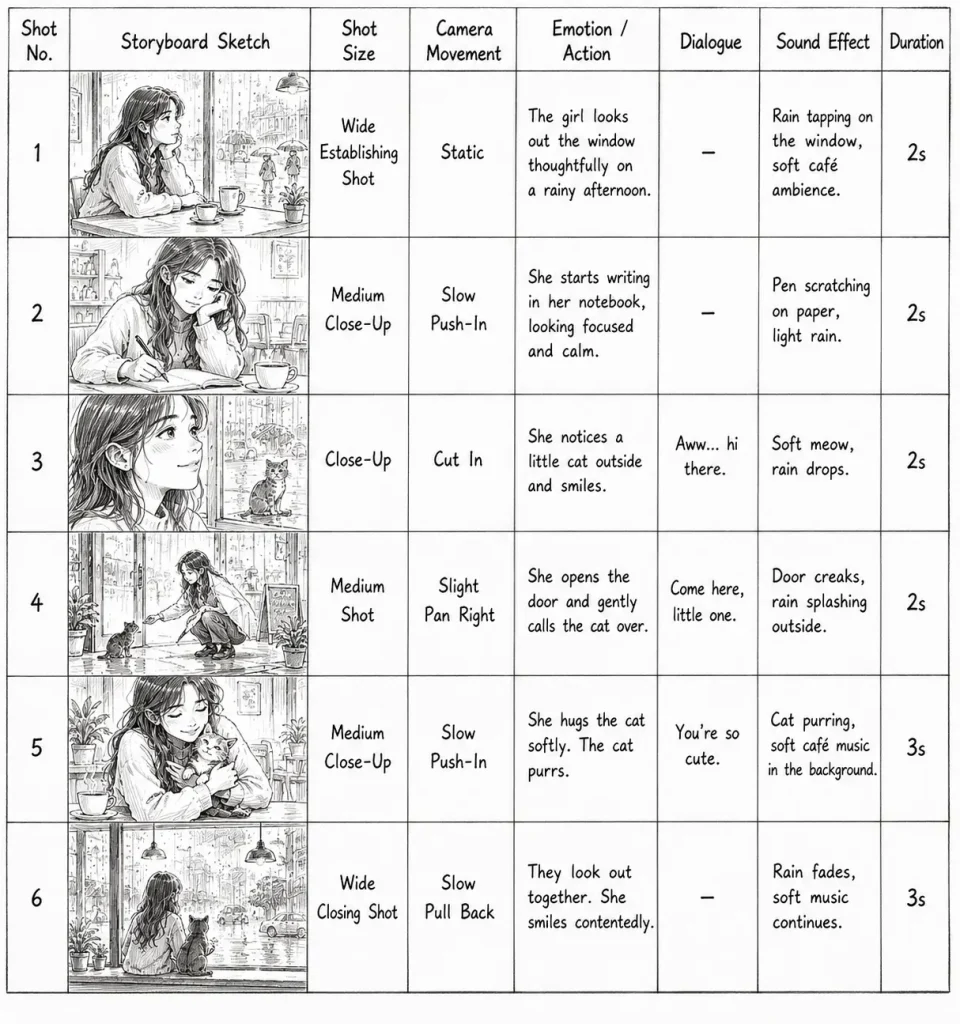
(1) Director’s Storyboard Generation (Hand-Drawn Style)
Start by prompting for rough, hand-drawn style storyboard frames that map out camera angles, character placement, and scene flow. Storyboard prompts should prioritize simplicity and spatial clarity over visual polish.
Here we provide a template for storyboard picture generation: “Based on the storyboard script I provide(generate in last step), create a hand-drawn director’s storyboard sheet in black-and-white pencil sketch style. Generate only shots xx to xx, and ignore all other shot numbers. The storyboard sheet should be a clean table layout. From left to right, include these columns:
Shot No. | Storyboard Sketch | Shot Size | Camera Movement | Emotion / Action | Dialogue | Sound Effect | Duration
Use the provided script content for each shot. The storyboard sketches should be rough hand-drawn thumbnails only, for structure reference, not detailed illustration. Keep the page simple, neat, and practical, like a real film director’s storyboard worksheet. No extra decorative elements. No excessive detail. Focus on layout and structure.“
This step validates your composition and narrative flow at minimal token cost — catching problems here saves expensive re-generations later. You can check all the scenes with your imagination in one picture before generating your video.
(2) Actors Asset Creation
When your project requires photorealistic human figures — product demos, corporate training, narrative content — the prompting shifts toward photography vocabulary. This is the highest-leverage skill for realistic output.
Example: “Professional front-facing portrait photo of a female with straight medium-length black hair, wearing a white short-sleeve shirt, mid-20s, shot on Canon EOS R5 with 85mm f/1.8 lens. Natural skin texture with visible pores, catchlight in both eyes. No retouching, no airbrushing, set against a dark gray studio photography background.“
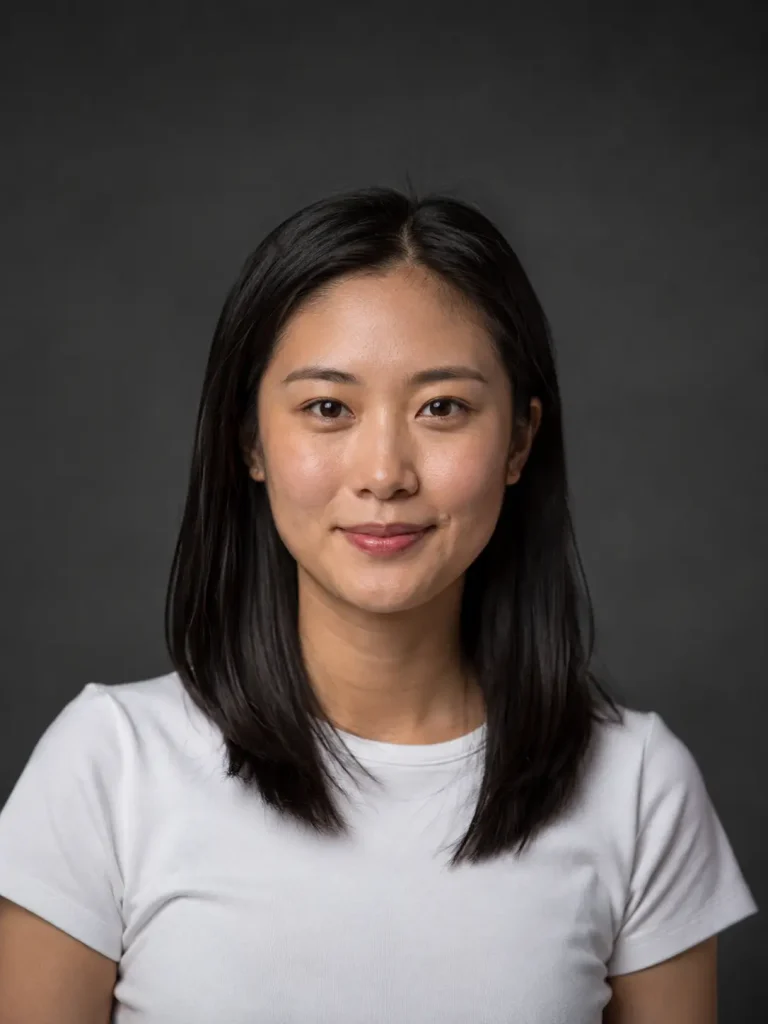
Key techniques: you can specify a camera and lens model to trigger optical characteristics from training data. Mention catchlight in eyes — it’s what separates amateur from professional-looking AI portraits. Describe imperfection (grain, natural skin texture) rather than perfection to avoid the plastic “AI look.”
(3) Character Asset Creation
Generate consistent character designs with defined facial features, body proportions, clothing, and expressions. Character asset prompts must include identity-locking descriptors so the character stays recognizable across multiple frames.
Example: “Character reference sheet, front and t-quarter view: East Asian male, mid-20s, lean build, short tousled black hair, slight stubble. Wearing oversized olive denim jacket, white t-shirt, dark jeans. Neutral expression and slight smile. Clean white background, consistent lighting.”
Include age, build, and distinguishing features. Where possible, generate turnaround views (front, side, three-quarter) in a single sheet for reference consistency.
(4) Generation of Clothing, Props, and Scene Assets
Generate individual wardrobe items, handheld objects, and environment elements that will appear in your scenes. The critical requirement here is visual consistency — every asset must share the same style, lighting direction, and color palette.
Example: “Product photography of a worn acoustic guitar, Martin D-28 style. Shot against solid #F5F5F0 off-white background. Soft studio lighting from upper left. Warm wood tones, visible scratches and pick marks on the body. Hex color reference: body #8B6914, neck #C4A265.”
Hex color codes keep colors consistent when assets are composited together — one of the most underused techniques in AI prompting. Shared lighting descriptors across all asset prompts prevent mismatched lighting in the final scene.
(5) First-Frame Scene Generation
This is where you assemble everything into the actual frame that the video model will animate. First-frame prompts demand the highest technical precision: clean edges, balanced composition, animation-friendly poses, and stable lighting.
Example: “Cinematic still frame, 16:9 aspect ratio: young male street musician playing acoustic guitar on a rain-wet Tokyo side street at dusk. Subject centered in lower-right third. Warm amber streetlight (#D4A574) from upper right, cool blue ambient (#2C3E6B) from sky. Shot at eye level with 35mm lens. Clean edges on subject, shallow depth of field on background. No motion blur, no extreme foreshortening, relaxed open body posture with both hands visible on guitar. Natural five-finger anatomy, proportional hands.”
This prompt applies the full 6-element formula — Subject, Style, Composition, Lighting, Color, Details. Note the animation-specific additions: no motion blur, no extreme foreshortening, clean edges, and anatomy safeguards. These prevent artifacts that would propagate through video frames.
(6) Photography Storyboard Generation
Create photographic reference boards that define the lighting setup, camera angle, and color grading for each scene. These serve as a visual blueprint that keeps the entire video visually coherent.
Example: “Photography storyboard reference: three frames showing lighting progression for a dusk street scene. Frame 1: key light diagram showing warm 3200K tungsten from upper right at 45°, fill ratio 4:1. Frame 2: reference shot with correct color grade, slight cyan shadows, warm highlights. Frame 3: lens reference showing 35mm moderate wide with natural barrel distortion.”
Photography storyboards use cinematography vocabulary — key light position (main light source), fill ratio (contrast between lit and shadowed areas), color temperature in Kelvin (lower = warmer), and lens focal length. These give image generators specific targets instead of vague aesthetic requests.
Key Takeaway: Each sub-step in Decision Point 2 has different priorities. Storyboards need simplicity. Character assets need consistency cues. Actor assets need photorealistic precision. Props need style matching. First frames need technical perfection. Photography storyboards need cinematography specificity.
Decision Point 3 — Motion Prompt: Directing the Animation
Motion prompts use a completely different vocabulary than image prompts. Replace visual descriptors with action verbs, temporal language, and camera movement terms.
Core motion vocabulary:
- Camera movement: pan (horizontal sweep), dolly (camera moves toward/away), tracking shot (follows subject)
- Subject motion: walk, turn, gesture, subtle breathing
- Physics cues: gravity, wind direction, fabric movement
Example: “Slow dolly zoom-in on the musician. Subtle finger movement on guitar strings, gentle breathing motion in chest. Light rain falling steadily, puddle reflections rippling. Wind gently moves hair and jacket collar. 4-second duration, smooth camera movement.”
For beginners, less is more. A slow zoom with subtle subject movement produces cleaner output than complex choreography.
Beginner Mistakes That Waste Tokens (and How to Avoid Them)
Writing the Entire Prompt at Once Instead of Layering
A massive first prompt often fails because models misinterpret conflicting instructions. Start with a 1–2 sentence base prompt, confirm the foundation, then layer detail one variable at a time.
Using Vague Style Words (“Realistic,” “Cinematic,” “Beautiful”)
These generic keywords produce generic results. The community’s highest-upvoted photorealism thread (838 upvotes) found that specific terminology dramatically outperforms vague descriptors. Instead of “realistic photo,” write “shot on Fujifilm X-T5 with 56mm f/1.2, natural grain, visible skin pores.”
Ignoring Composition and Background for Video
Unspecified backgrounds produce elements that shift and flicker during animation. Always define the environment, even if it’s simple: “solid #1a1a2e dark background” or “shallow depth of field, blurred office interior.”
Skipping the Storyboard Step
Jumping straight to high-quality generation without storyboarding wastes tokens on scenes that don’t work in sequence. A quick hand-drawn style storyboard validates your composition and narrative flow before you commit to expensive full renders.
Platform Tips for Image-to-Video Beginners
ChatGPT / GPT Image — Natural Language, Conversational Iteration
Best for beginners who want to refine through conversation. Watch for oversaturation and soft focus defaults — add “muted natural color palette, sharp focus” to counteract.
Google Gemini / Nano Banana — Free Access, Strong Portraits
A strong free starting point. Nano Banana Pro is rated most natural-feeling for portraits by the Reddit community, though output resolution is lower than paid alternatives.
Midjourney — Artistic Quality, Less Literal Execution
Best for stylized projects. Important caveat: Midjourney interprets rather than executes prompts literally — it exaggerates beauty cues and smooths faces, which can cause inconsistency across video frames.
Stable Diffusion / Flux — Full Control for Technical Users
For users willing to invest in setup. ControlNet and ComfyUI workflows are especially valuable for video pipelines — pose consistency, batch generation, and frame-by-frame control.
Conclusion
Effective AI image-to-video prompting is not about one perfect prompt. It is about understanding the decision points — concept, image assets, and motion — and writing the right kind of prompt at each stage. You don’t need to prompt an essay at every step, but to find the proper way at proper time.
Decision Point 2 is where most of the work happens. Breaking it into six sub-steps gives you control over every visual element before animation begins. Just Start here: Write your concept prompt, generate a quick storyboard to validate your vision, then work through each asset type in order. Bookmark this guide as your reference for every stage of your AI image-to-video workflow.